Author: Jamie Alberico

  • Your Guide to DIY Wheel Painting – Like a Boss

    DIY Wheel Painting- Step 6
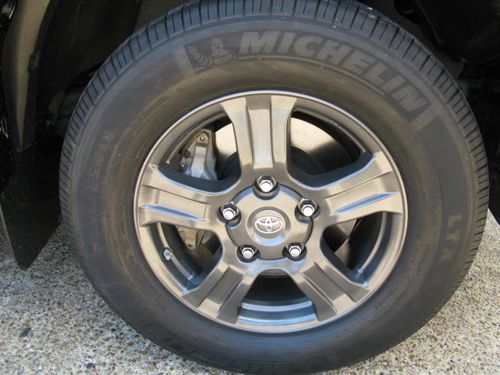
You work hard and you deserve your truck candy.  Let’s face it.  Steel wheels can make even the most beastly mecha-Tundra look like an over-sized Power Wheels. Whether you’re a DIY junkie or looking to outsmart a wiry bank account, this DIY guide will get you the crisp, clean look you deserve for under $50.

    DIY Wheel Painting- Supplies

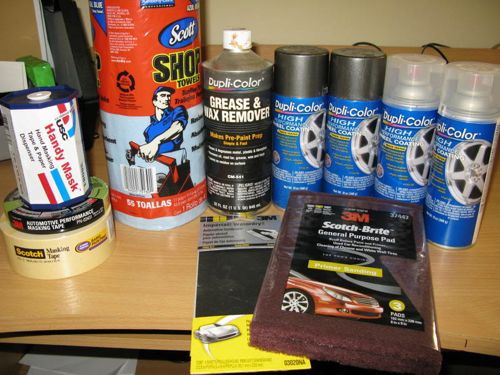
    Materials You’ll Need:

    (2) Cans Dupli-Color WP10() High Performance wheel coating (WP103)
    (2) Cans Dupli-Color HWP103 High performance wheel clearcoat
    (1) Can Dupli-Color CM-541 Wax and grease remover
    (1) Roll 3M ¾” green high performance tape PN-03431
    (1) Roll 3M 2” Scotch masking tape 2015
    (1) Roll Shop towels
    (1) 3-Pak maroon 3M Scotch Brite pads 37447
    (1) Sleeve 600 grit 3M wet or dry sand paper 03020NA
    (1) 5-gallon bucket (optional, but will make your life much easier.)
    (1) Tack cloth (optional but highly advised!)

    How to Paint Your Wheels: a DIY Guide

    Steel: it’s functional, more durable than alloy and cheaper– but this frugal/durable mindset falls short on aesthetics.  Spend a warm day with the garage door open and a great playlist and you’ll be rewarded with a great look and the cash to celebrate.

    Before You Install

    Difficultly level: Beginner

    Project Time: 6 Hours

    DIY Rating: 8.  Like all DIY project, this takes time and patience.

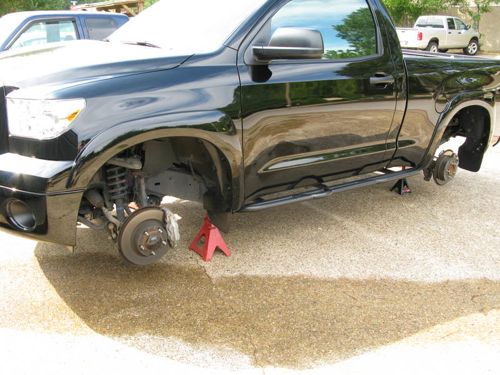
    Step 1: Take ‘em off.

    Start being being smart.  Park on level ground and set the parking brake. Loosen, but don’t remove all lug nuts. Lift the front of the vehicle and place on jack stands.  Remove the front wheels. Repeat the process for the rear.

    DIY Wheel Painting- Step 1


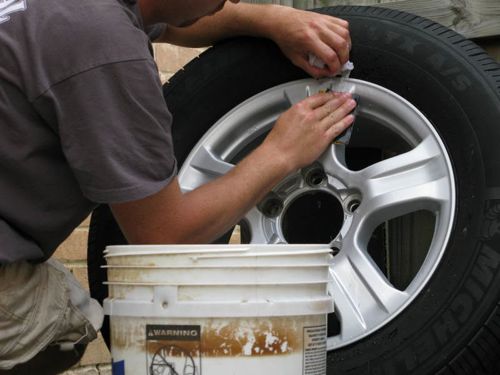
    Step 2: Scrub-a-dub-dub.

    Once all the wheels have been removed it is time for some serious cleaning. When I painted the wheels on my ’73 Beetle, soap and water barely phased 40 years of grime. Home Depot carries an eco-friendly degreaser called Simple Green. At about $10/gallon, it tears through the grease and lets you move on to the fun stuff.

    An old painter’s trick is to use some Comet in combination with a red scotch brite and water to clean and prep the surface simultaneously.  If you opt to use comet, grab some elbow length gloves and do NOT touch your face.

    Scrub the wheels inside and out. The trick to a great DIY is making it look like a pro did it. If you want the paint to stick, the wheels need to be spotless.

    DIY Wheel Painting- Step 2

    Step 3: Sand!

    Once the wheels are OCD clean, you’re ready to sand. Grab your 5-gallon bucket and fill it with warm water and about a quarter-squirt of dish soap. Soak a couple of the wet or dry sandpaper sheets in there and give them a couple minutes to “soften” up*.

    Dip a rag in the water and use this to irrigate the area you will be sanding. Fold the sandpaper over and get to sanding. Use smooth overlapping motions and be sure to check your work every once in awhile. You can do so by drying the area to check for remaining shiny spots. Sand the entire wheel.

    *Couldn’t I dry sand my wheels?  Yes and you will enjoy a slow, steady stream of steel dust.

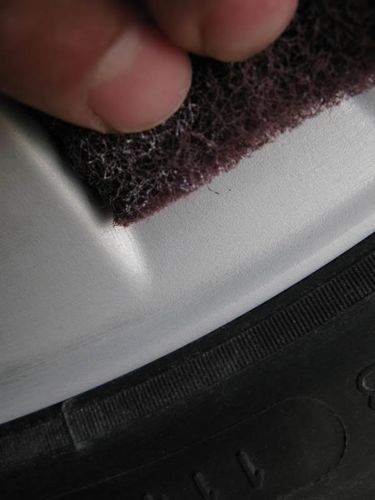
    Step 4: Give it a once over with a Scotch Bright Pad

    Once you’ve rinsed the wheels and let them dry, go over them again with a maroon Scotch Bright pad.  This will even out your sanding and catch any spots you missed.
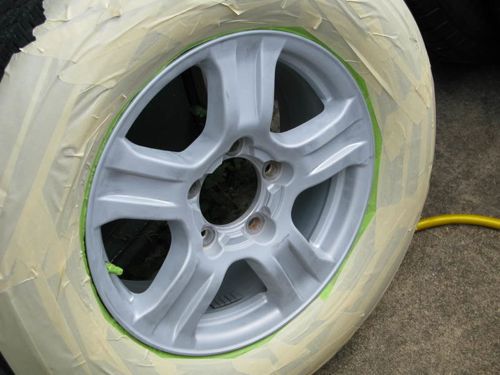
    DIY Wheel Painting- Step 3

    Step 5: Mask

    They keys to a good mask job are neatness and completeness. A sloppy mask job with several folds and wrinkles will only provide a place for dust and trash to settle that will later end up in your paint job.

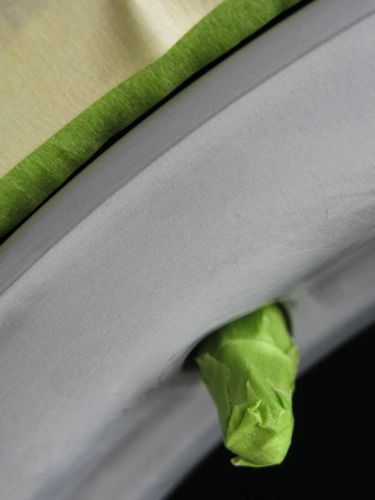
    Good rule of thumb here: if you can see tire– keep taping.  You’ll never realize how much paint gets picked up in a slight breeze until you have your tires have over spray highlights.  Be sure to wrap the valve stem.

    DIY Wheel Painting- Step 4

    DIY Wheel Painting- Step 4 Close up

    Step 6: Grease and Wax remover time

    Grab some wax and grease remove and a roll of shop towels.  Apply the remover with one rag and remove it immediately with a dry, clean one. Each step of this process is as crucial as the next.

    Once you are done, blow off the wheels with compressed air and wipe again with either a lint free towel or a tack rag.  If you don’t have compressed air, run to Office Max and grab some.  You’ll be back and finished before you could manually remove all traces of dust.  Remember, paint simply won’t stick to a greasy or dusty surface.
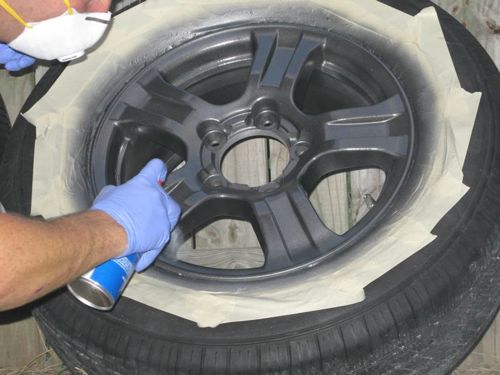
    Step 7: Paint!

    Read the directions on the can of spray paint.  Then read them again.  There’s no one size answer for how to apply wheel paint or how long it will take to dry.  Only your can knows for sure.

    If you’re going James Bond gun-metal or any shade of metallic, a tack cloth is your best friend.  Metallic paint is tricky.  The metal particles need to flow evenly through the mist of paint in order to lay down properly.  Get sloppy and you’ll end up with a clustered or mottled look.

    After the first coat of paint has dried, you may notice a slightly dusty finish. This dust is made of excess metallics and over spray that didn’t settle or conformed with the paint. Once the paint is dry to the touch, run your tack rag over the surface to remove the particles. This will leave a smooth layer for which to apply subsequent layers of paint.

    Clear coating is a bit of overkill, but if you opt for that extra glossy look don’t wipe it down with the tack cloth between layers.  Since there aren’t any metallic particles in clear coat, you’re really just mucking up your shine.

    DIY Wheel Painting- Step 5

    Step 8: Take a step back and look at those damn sexy wheels.

    Good job, buddy.

    DIY Wheel Painting- Step 6

    Many Thanks to TundraSolutions member Swank501 for his original DIY Wheel Painting post and images.

    Search terms people used to find this page:

    • 2008 toyota tundra touch up paint
    • tundra wheels and tires
    • 2008 toyota tundra tires
    • 2011 stock tundra wheels
    • custom hard headliner
    • ram truck production problems
    • tundra trd wheels for sale
    • Wheels
    • www wheels and tires for tundra

    The post Your Guide to DIY Wheel Painting – Like a Boss appeared first on Tundra Headquarters Blog.

  • Tundra Headliner Removal – A DIY Guide

    Removing the headliner in your Tundra is technically sort of “easy”– it’s just very, very time-consuming. If you’re wondering why you’d remove the headliner:

    1. You might want to replace your existing stained or sagging headliner
    2. You’re looking to add sound-proofing or insulation

    Here’s a step-by-step guide to headline removal with photos.

    How to Remove a Tundra Headliner


    What You’ll Need:

    • Socket wrench
    • Small flathead screwdriver
    • Electrical tape
    • Patience. If you’ve got an extra set of hands, you can knock this out in a few hours.  If you’re flying solo– don’t make any plans for the rest of the morning.

    How to Remove Your Tundra’s Headliner

    Removing your headliner is a slow, systematic process.  You’re about to have a lot of small pieces.  Lose a single bolt and you’ll be listening to an incessant rattle in your cabin.  Since you’ve already got your electrical tape out, tape the bolts or screws to the plastic caps.  Lay all the pieces out together and avoid the urge to start shoving bits in random pockets.

    Start at the A-Pillar

    Step 2: how to locate the bolts and remove a-pillar

    Step 1: Cover the tip of a small flathead screwdriver with electrical tape. This will keep the metal from scratching the plastic when you use it to pry open plastic caps.

    Step 2: Remove the plastic cover on the A-pillar to reveal the 2 hidden 10mm bolts.

    Step 2: Remove the hidden bolts in the A-pillar

    Once they’re removed, the A-pillar simply lifts out.

    Step 2: Lift and release the A-pillar to remove.

    Remove the B-Pillar

    Step 3: How to loosen the bolts in the B-pillar

    Step 3: Work your way back to the B-pillar. Free the plastic covers on the handle and unfasten the two bolts.

    Step 3: Remove the bolts located in the handles

    Step 4: Down by the seat tracks, you’ll find the seat bolt hidden by a plastic cover. Remove the bolt. Release the lower half of the B-pillar by carefully unlatching the small white clips.

    Step 4: Remove the Seat Belt Bolt

    Step 5: Once the lower portion is off, you’ll be able to remove the 10mm bolt holding the upper portion of the B-pillar to the steel. Pop out the upper portion of the B-pillar by releasing the clip next to the screw and pushing the tab at the top.

    Step 5: Remove the upper portion of the B-pillar

    Loosen the C-Pillar

    Step 6: Loosen the C-Pillar

    Step 6: You won’t need to remove the C-pillar, only loosen it enough to pull the headliner out. Remove the plastic cap that serves as the SRS Curtain airbag badge. Remove the bolt.

    Step 6: Find the C-Pillar bolt under the SRS badge

    NOTE: At this point, it’s important to mention that monkeying around with your trim panels isn’t without risk. If you screw-up the re-installation, you could reduce the effectiveness of your Tundra’s side curtain airbags. Granted, the risks here are small, but it’s not something you should do unless you’re going to be careful.

    Remove the Hanger Hooks, Passenger Handle, and Driver’s Overhead Cover

    Step 8: Remove hangers, passenger handles, and other accessories

    Step 7: Each of these pieces is held in place by metal clips. Start in the backseat with the hanger hooks. Using your tape-covered flathead screwdriver to pry off the plastic cap. The metal hooks pop out easily with your screwdriver. Work your way through the passenger handle and driver’s overhead cover.

    Step 7: Remove headliner attachments by popping out the metal clip

    Detach the Sun Visors

    Step 8: How to remove your sunvisor

    Step 8: Remove the plastic cover on the main assembly and unfasten the 3 torx screws. Remove the lone screw located under the sun visor clip.

    Step 8: Remove the sunvisor

    If you have a vanity light, disconnect the wiring harness.

    Separate the Overhead Console

    Step 9: There are 6 torx screws holding the overhead console in place. To access the two hidden underneath the rear light assemble, pop off the dome cover with your screwdriver.

    Step 9: Remove the screw located behind the Cabin light.

    Pull off the metal plate and you’ll see 2 screws in the corners.

    Step 9: Remove the overhead consoling by removing the 6 screws.

    Step 10: Open the business card compartment and remove the two screws hiding in the back.

    Step 10: Remove the screws located in the business card compartment

    Step 11: The last two screws holding the overhead console in place are hidden behind the back up camera housing. Pop out the housing with a firm tug and remove the remaining screws.

    Step 11: Remove the back-up camera housing to access the last 2 screws

    Step 12: Unplug the wiring plug harness(es)– you may have two– and carefully set the overhead console aside.

    Step 12: Unplug the wiring harness and remove the overhead console

    Remove the Door Trim Molding and Remaining Clips.

    Step 13: At this point, your headliner is held in place by door trim molding and 4 small white clips in the rear. Start with the clips, then slowly release the headliner from the door molding.

    Step 13: Remove the Door Trim Molding and Clips


    Congratulations!  You removed your headliner with the patience of a samurai.  To reinstall your headliner, reverse the process.

    Many Thanks to TundraSolutions member Jumbo Jet for his original DIY: Headliner Removal post and images.

    Search terms people used to find this page:

    • new toyota tundra redesign 2014
    • how to remove a headliner from a 2011 toyota tundra
    • 2014 tundra
    • toyota hilux lift kit
    • hidden compartments for hilux pickups
    • how to remove headliner tundra
    • 2014 toyota tundra spy
    • tundra endeavour bumper sticker
    • tundra maintenance
    • new toyota tundra 2014

    The post Tundra Headliner Removal – A DIY Guide appeared first on Tundra Headquarters Blog.