This is wonderful. To see Ikea raw pine flesh out Enzo Mari’s Autoprogettazione table. Thanks Greg!
See Greg’s post on Enzo Mari’s Autoprogettazione table with Ivar and the photosets.
This is wonderful. To see Ikea raw pine flesh out Enzo Mari’s Autoprogettazione table. Thanks Greg!
See Greg’s post on Enzo Mari’s Autoprogettazione table with Ivar and the photosets.
No hacking here, but if you have a doggie, you may appreciate the tip. And yeah, I couldn’t resist posting up the pic of Molly’s cute dog, Colonel Mustard.
Molly shares, “After 5 years of heavy use, my Ektorp Lindalen sofabed slipcover needed to be replaced. I sprung for a new one when I bought my house, but had the old one left over and didn’t know what to do with it. I also needed a place for my beagle, Colonel Mustard, to hang out…and preferably not my newly-recovered couch.
The Colonel has had a rough time with dog beds – either he figures out how to chew them up or he ignores them. I noticed one day that his favorite place to curl up was my laundry pile, so I came up with the idea to stuff the retired cushion slipcover with old/stained/torn/worn-out clothes as well as a few old, deflated pillows. Stuffed it all in, zipped it right up, no sewing or construction needed.
It didn’t cost me a dime, it’s heavy-duty canvas, and more importantly, he LOVES it and hasn’t even tried to chew at it. I’m thinking it calms him when I’m gone because his owner’s scent is already built in by nature. But even if he ends up nibbling at it, it’s ok – I’ve got 3 more cushion covers left from the old slipcover!”
“I painted the frame with a simple white acrylic paint. Quickly covered the black for intended imperfection.
Used a spray paint primer for glass, then a couple coats of chalk board spray paint.
(the empty frame even looks kind of cool on the wall).
Assembled!
Note: The glass is not cut into a perfect oval shape. Make sure the side you are painting fits into the frame right side out!”
Raquel and Oscar from Bilbao, Spain, send us a trio of hacks. I’m pretty taken by the bench, composed from Lack side tables and Adel drawer fronts. Nice one. If you have a tight corner, this is definitely a solution you can consider.
Kitchen bench
Bench for the kitchen, made with four Lack side tables (4,99€ x 4 units= 19,96€), covered with Ädel drawer fronts taken from the as-is section (0,50€ x 44 units = 22,00€). Everything fixed with carpenter’s glue and small metal squares. All the set for 41,96 €. Very cheap!! The back is topped with ceramic mosaic.
Carved Snudda
The Snudda lazy susan, carved by my father. Smart!
Reusable shopping bag
From the Elisabet fabric, hand sewn.
Kathy added a few touches to the Pax wardrobe to create this warm, woody closet. If I didn’t know better, I’ll think it’s a spa and stretch out for a massage.
“I found your web site quite by accident and felt I had located long lost relatives I never knew existed. I have been hacking Ikea items for years but never knew the practice had a name (or a following). Here are photos of just one of my favorite projects. This is my master bedroom closet that I outfitted entirely in Ikea pieces (mostly Pax wardrobes but also drawer units that I’ve forgotten the name of and the ever-popular Expedit. (I worship at the altar of Expedit.)
I started with plain, birch wardrobe doors and embellished them with 4 elements:
– brown and black toile wrapping paper
– expanded metal that I custom-painted with hammered bronze spray paint
– wood trim that I also painted with hammered bronze spray paint
– and finally, door handles made from curtain rods screwed in sideways
I also mounted a Christmas wreath around the main light and wired it to a remote control switch. I use it for ambient lighting.
It is my favorite room in the house, even though it’s only a closet. Enjoy!”
I can’t forget my Donkey Kong days so this hack is especially heart warming. Casey pays homage to the game with some ingenious tilted Lack shelves.
“Here’s a little project I came up with using some Lack shelves to add some flair to my game room. Using some tape, paint, and a lazy afternoon I put together a Donkey Kong homage to keep my old systems on. The ladders were made from 1/4″ square wood and the barrels are beer cans painted.”
Click to see more of Casey’s Donkey Kong shelves.
A new take on one of hackers’ favourite items, the Stolmen pole. Instead of stretching it all the way to the top, dragon_ll screws the poles to the underside of Lack shelves, which are then bolted to the wall.
“Back Story – I wanted a TV unit to mount my 52” LCD. I liked the ones that have a back panel where you can screw the mounting bracket on and have shelf space on the side for your A/V components. Most places were expensive including Ikea … So I decided to make my own using whatever from wherever. Ikea was a great place to start as their stuff was easy to modify.
Hacking – I came across the Stolmen system that I liked a lot and it even had the back panel for the LCD TV. The problem was it was white. I needed black to match my decor. So I searched the Ikea store for something to use as the back panels. The good thing about Ikea is that they have variety within each system… The annoying thing is that they don’t have each piece in all the colours.
Anyways I was limited to the Lack side tables that came in black. I used 5 Stolmen posts each spaced equally apart (Lack table plus connectors). Used 4 Lack tables to create the back panel and 2 Lack tables per side for the shelves and because my ceiling was too high I used a Lack table and shelves at the top of the posts and then screwed the stablizers from the stolmen posts to the underside of the Lack tables to the wall. That makes it look like it’s floating.
To connect the tables to the posts I used the Stolmen shelf connectors but with the standard wall hangers from any heavy shelf/wardrobe system. Screw them into the sides (for back panels) or underneath (for shelves) and with nuts and bolts for Home Depot they attached nicely to the Stolmen connectors. The LCD TV bracket was centered between the 4 back panels and each has 3 bolts with predrilled holes through each Lack panel for a total of 12 bolts.
Now I know the Lack tables have a semi hollow core but I knew it was strong enough. It’s been almost 2 years holding up this 130lb LCD TV. I later added the besta storage to the bottom to store my blurays and games (also using the Stolmen connectors and heavy duty metal angles from Home Depot).”
Here’s a little contraption from Andrew, that’s just right if you like working on your laptop while sitting on the floor.
“I wanted something that would hold my laptop while I was sitting on the floor or lying on my bed, without having it lie directly on me (when I was lying down the weight caused some discomfort for my stomach, and while sitting down the position strained my back.)
So I bought the Ikea Magasin dish rack for $5 and modified it into a little table with about 12 bolts and some sawing and drilling. It worked out quite well.”
Here’s how it looks in action
and folded up.
Maya turns the Skruvska swivel chair into quite a stunner.
“I bought a badly-scuffed white Skruvsta office chair in the “scratch-and-dent” section of Ikea in Israel, as well as some fabric remnants. I used these remnants to recover this chair entirely, adding some extra padding to the chair cushion. I initially covered it without batting, but the seams of the chair showed through, so I covered the entire chair with a layer of batting… and now it feels much cushier! I fitted the fabric to the chair by stapling it on and drawing the outlines of the pieces I wanted to sew, then pulling out the staples and sewing the pieces of the cover together. It’s stapled down on the bottom but the cover would not be hard to remove and wash. Now the chair makes me smile whenever I see it, and it’s more comfortable to boot.”
Another hacking vid. Jan hacks the Sunnan lamp into a solar powered strobe-opto-theremin-synth-thing.
I love the updated assembly instructions too.
See more here.
Ubernerkle converts a Hemnes 8 drawer dresser and two Leksvik bookshelf cabinets into a home bar. See how it’s done in the vid.
Related hack:
– Cheers! It’s a Kegerator.
– A home bar from kitchen furniture.
Porro made this cool yarn swift from a Rationell Variera pot lid organizer and Snudda Lazy Susan. It’s pretty easy to achieve too. Just mark the spots where you want to place the lid organizers. Drill holes and screw them in.
Visit her blog for her yarn swift instructions.
Norman adds “flight simulator support” to his desk.
“I moved across the country and did not bring any furniture with me, only belongings. I was looking for a desk to house my computer, but had some criteria. I like to flight sim on the PC therefore I had a yoke and throttle unit that I had to accomodate. Also, the yoke and throttle clamp onto the desk in such a manner that if there was a lip on the front edge of the desk it does not clamp well. I also didn’t have too much room and did not want a huge elaborate solution. In addition many dedicated gaming-desk type setups are quite costly compared to the price of what I got. Compactness, simplicity, and ease of assembly/modification (no access to a workshop here!) were important to me in my choosing. I spent quite a while at the nearest Ikea until I thought up the following solution:
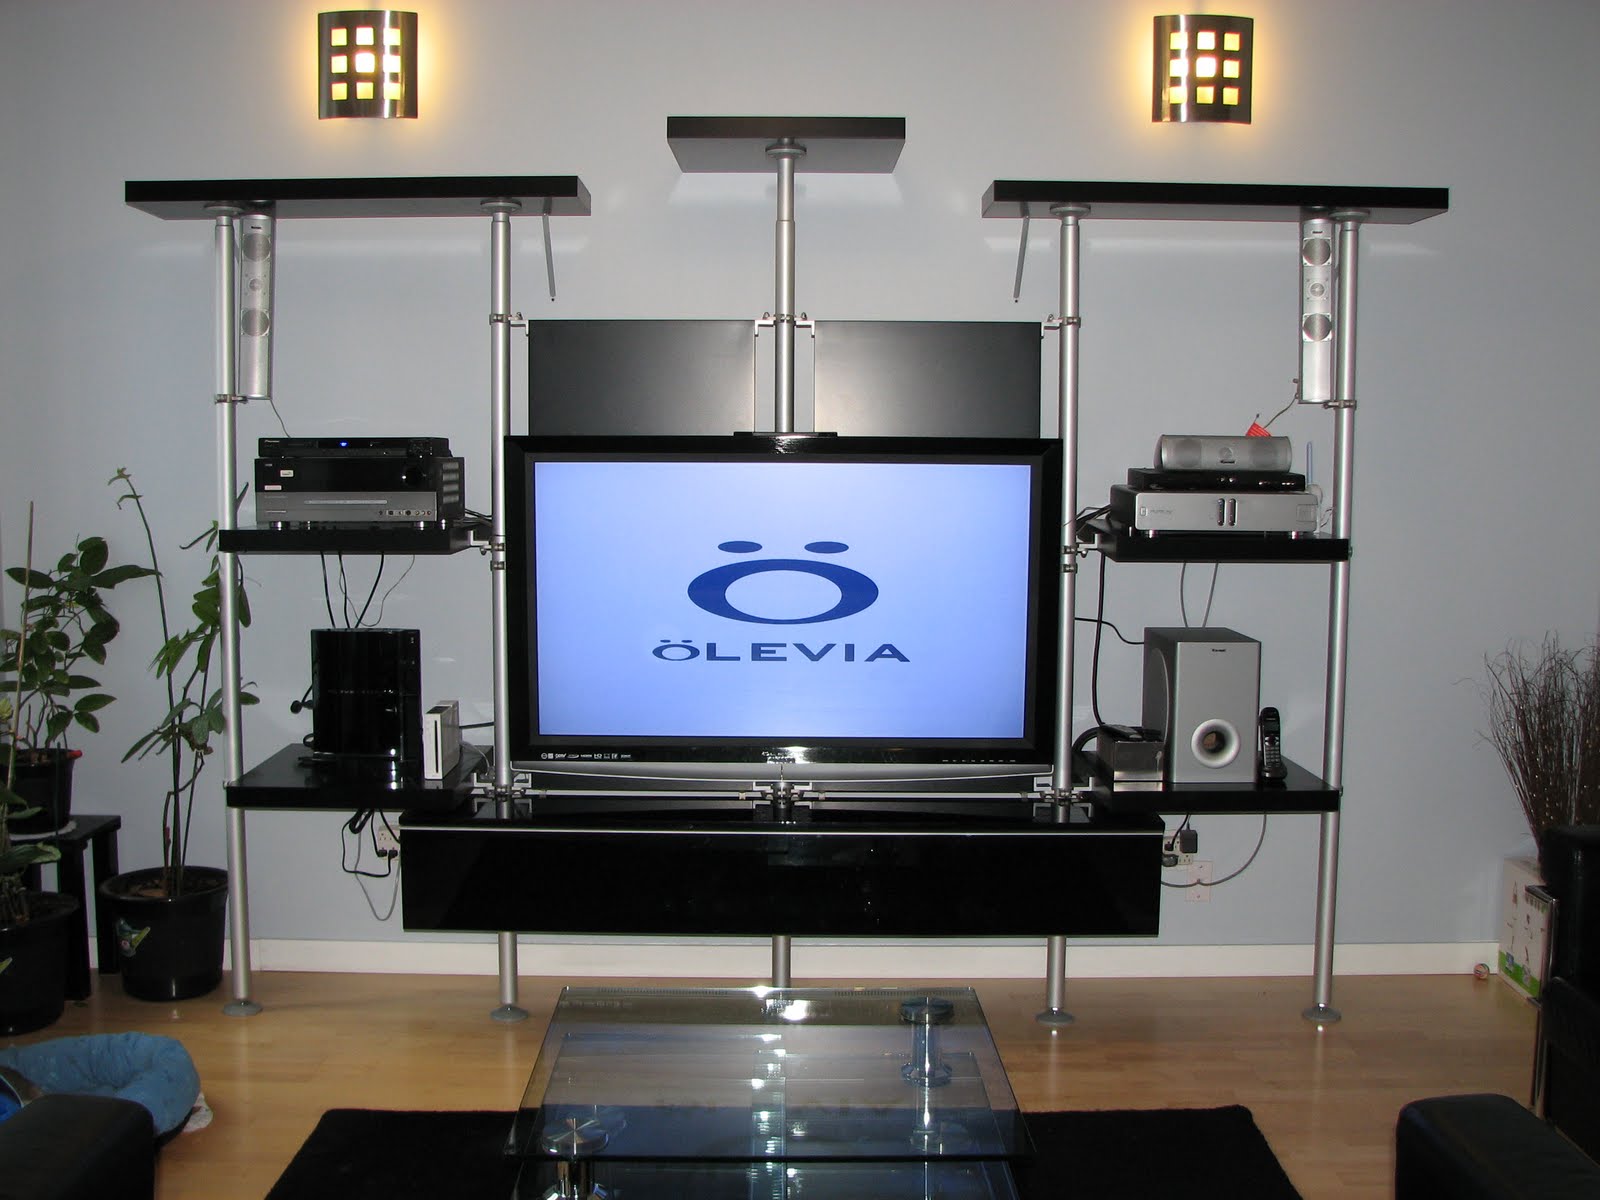
– The desk pictured is the Mikael computer workstation.
– I merely assembled the bottom half of the desk as instructed. I didn’t want the top pieces, however, because I like to have a lot of open desk space I just left the top half off. The thick, lip-less pieces of the desk surfaces provide ideal clamping for my yoke and throttle.
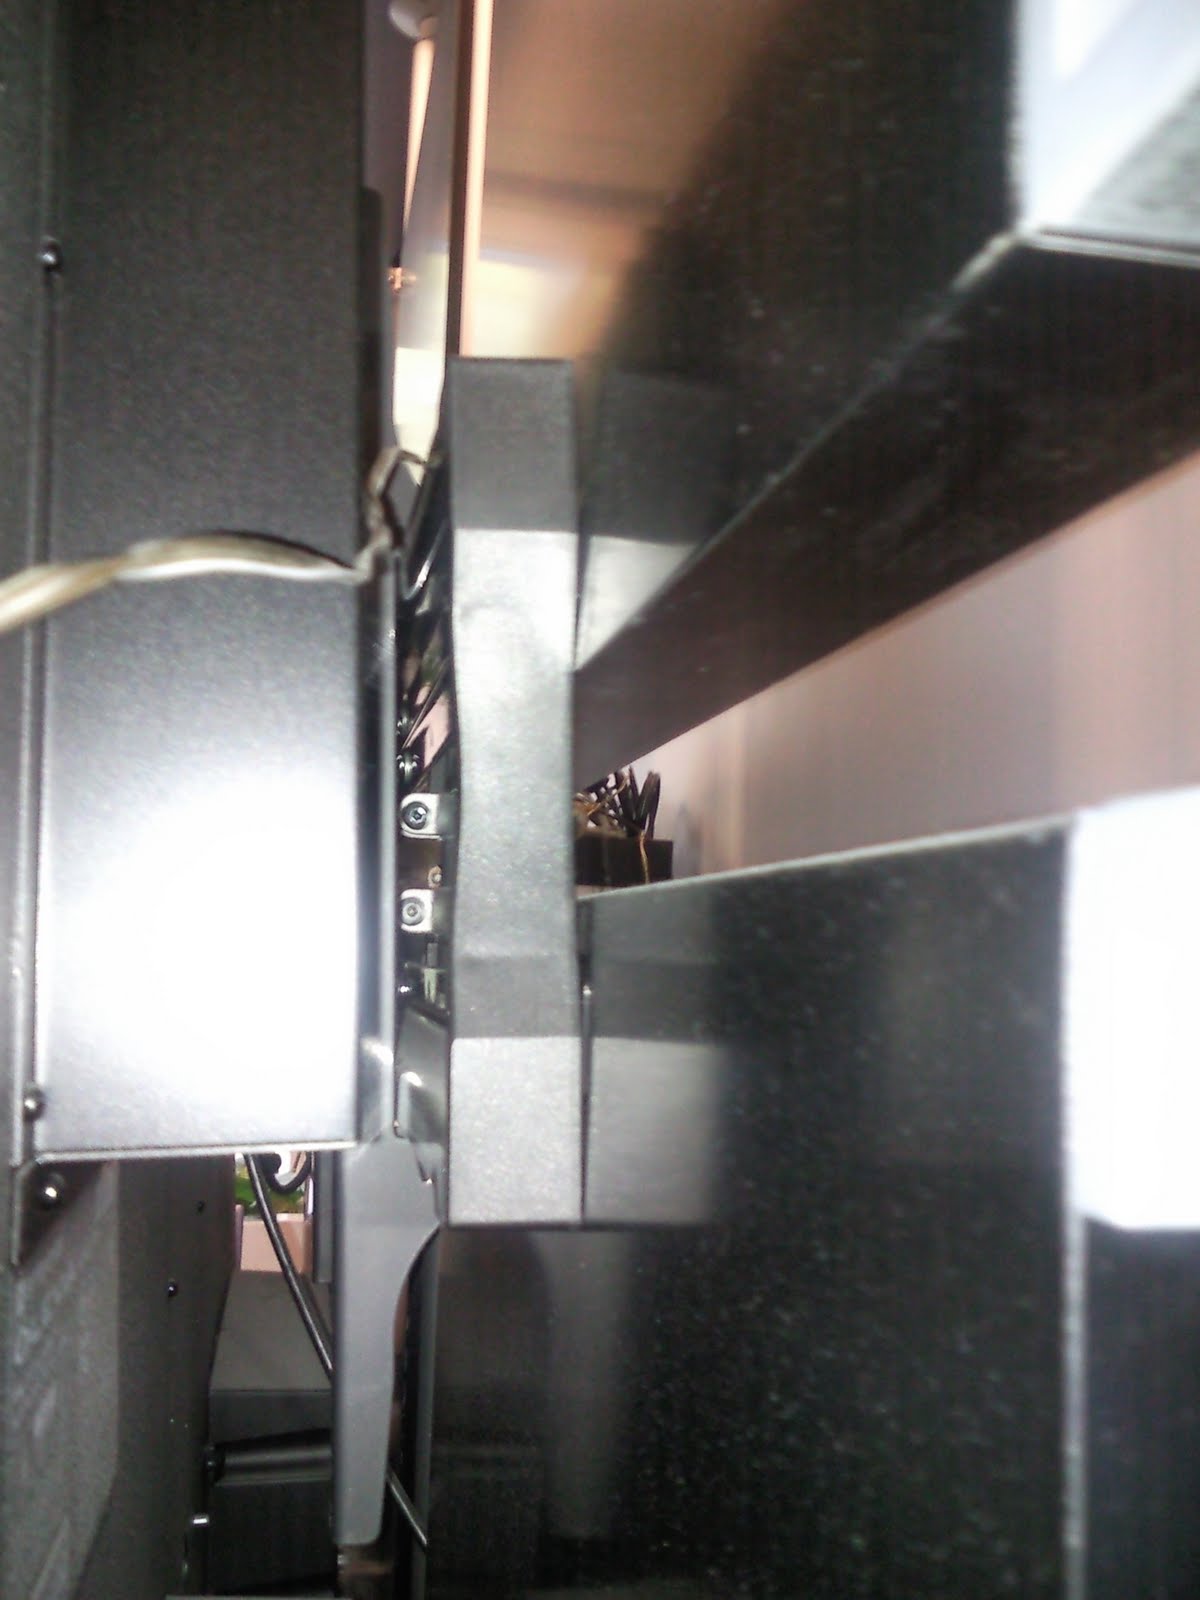
– To accomodate the throttle quadrant in a “realistic” position, I merely took the very top piece (with the filing “stands”) which fortuitously is just about the same width as the CPU cabinet. Therefore, simply taking that piece as a large plank and installing a few L-brackets in the CPU cabinet I was able to get it to stick out as a platform on which I could mount my throttle.
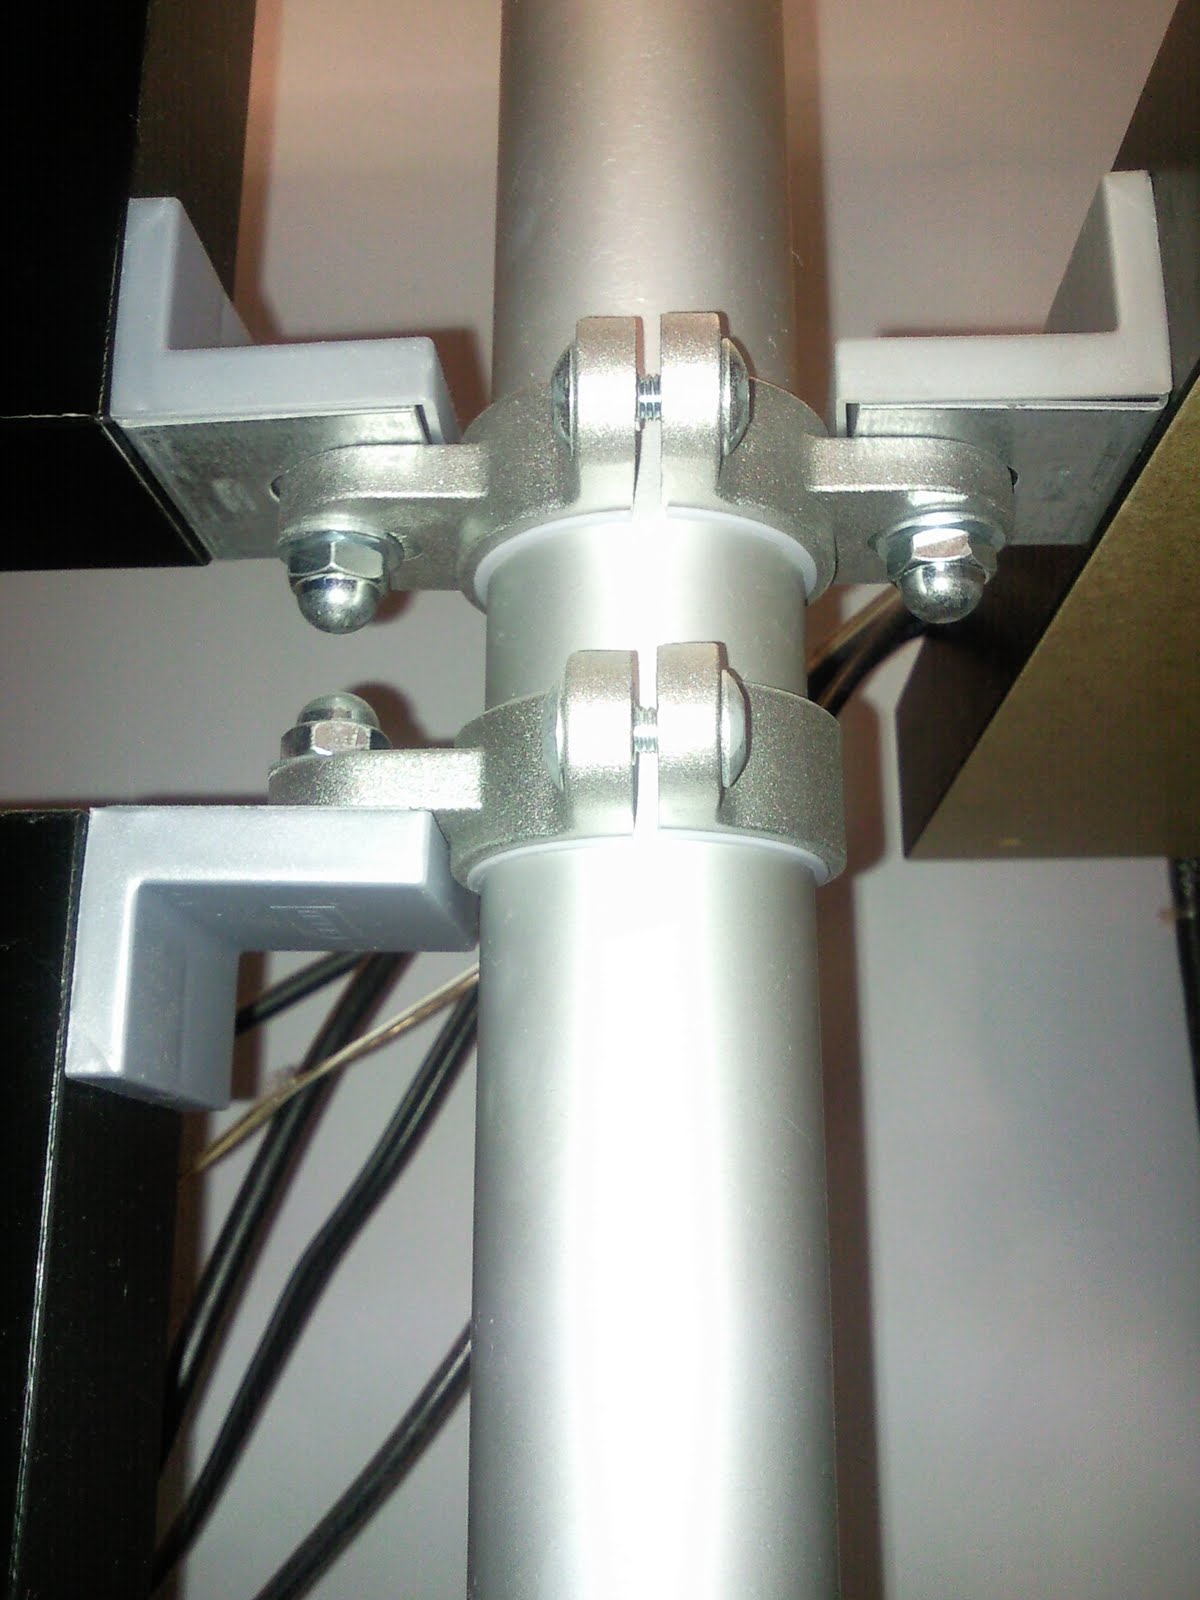
– I used a total of 8 L brackets, four installed in the “L” shape and four in the “7” configuration. This means the plank is not held into the desk by screws, and can be easily slid out if you need to for example access the computer, or want to store it away for a neater appearance. Now that there are two monitors on my setup I don’t really pack it away anymore though.
– Since my PC is a small form factor it is low and fits perfectly in its little “cubby” on the bottom. If I had a bigger tower I don’t know that this hack would work.
– Later on I purchased a larger monitor and moved my old LCD down to the platform as a secondary display, providing further realism to serve as a second “instrument panel”. You can see that the secondary monitor is bent far down enough such that you can pull out the desk and access the contents with no interference issues. As the monitor is pretty easily adjustable I can stand it straighter or fold it down depending on preference/need to get into the drawer.
As far as cable management goes, because the pieces of the desk are quite thick, I bought some of the Ikea cable tubing and nailed it to the rear of the desk. Therefore all the cable runs kind of follow the contours of the desk on the rear thus you can’t really see wires if you’re looking at the desk despite the fact that there is no backing material to hide cables behind.
Like I said the hack is absurdly simple, especially it only requires 8 L brackets in addition to whatever you get in the Mikael pack.
In all I found it’s worked out quite nicely, I get enough desk space on the top surface and have a great little compact but very effective flight sim setup. The “correct” positioning of the throttle levers helps increase the immersion factor and the secondary monitor there adds to the experience as well. In reality I found the Mikael workstation (without the top) to be a great compact computer desk for any need. I admit that my little modification might not have a lot of use for a lot of people but I’m sure in typical IKEAhacker like fashion others might find inspiration to expand on the concept… Something similar would probably work well for people who have racing wheels on their computers as well.”
Divide your room with lights. This one is from XedMada.
“It’s quite simple really, for each unit you need just one Orgel paper lamp and one Dioder color LED unit. Take two of the bars from a Dioder LED kit, gently slide them under the bars on the top front inside of the paper shade of the Orgel paper lamp shade. Be careful not to poke a hole in the paper.
It’s easiest to slide the bars in one at a time then connect the two in the center and the power cord at one end. Install the shade, again, careful not to rip the shade. The bottom bar just slips in from underneath once you have the shade installed and rests on the bottom inside against the lamps power supply. A little double sided tape helps you keep it in place and properly focused. Run the cord of the top LED bar to the inside supporting pipe and down the back so it doesn’t cast a shadow. In the photo I have two side by side, using one Dioder controller for the top colors and a second set for the bottom. Using the mini CFL replacement lamps I was able to meter a safe load of 5 of the units in one series (the box says only to use three in a series, but that’s with the higher draw tungsten lamps.)
An important side note: If you plan to use multiple LED sets together make sure to buy them all from the same batch. Even a week later was long enough for me to get a different run of LEDs that didn’t quite match the color of the two sets I purchased previously.”
Diego and Monica “Zuzzù” has a simple wall hack for us.
“To create this simple but original composition we used the Traby system: 4 shelf units and 2 doors. We removed the door handles and plastered the holes. Then we painted the doors white. We also add the new Grip handles at the top the doors. As alternative drawers, we used two Branas Basket in the two centre shelves.”
See more on their blog facciotuttodaseduto (I do everything seated) which is in Italian.
Sophie writes,
“I’m a French girl with an old Ikea lamp. I customized it with some English fabric from Liberty. If it interests you, you can see it here.