Author: Jules

  • Walk in closet from kitchen wall panels

    Materials: Ikea kitchen wall panels

    Description: I didn’t want to have bypassing sliding doors for my bedroom closet and thought one door would save space. My house is old but didn’t have much in the way of good salvageable architectural details. I bought some Ikea kitchen cover panels (look for them in the damaged area, they are expensive otherwise) They usually have a lot there which are only damaged on one side. Got some construction adhesive, clamps, and a nail gun. The sliding mechanism for the door is just stock iron pipes and casters from any home store.

    ~ Mike Izzo, South Jersey


  • A vintage suitcase laptop table

    Materials: Dave laptop table

    Description: This is my second luggage project. I love to upcycle old luggage into tables, so it seems. This guy was given to me in his original pre-loved state by a wonderful man I work with during the holidays when he heard I was into ‘the luggage’. He had used it and found it in the garage, unloved, and lovingly gave him to me to upcycle and make useful. Perfection.

    Blue Footed Bobby, as it also turns out, is an Ikea Hack. Once I completed cleaning, priming, painting and finishing up his stripes with some magic shiny tape I was on the hunt for legs. He’s not a large suitcase, just the right size, medium. He needed legs that matched his style and size. I hunted and hunted for something inexpensive and suitable. What did I end up using? The base from my very own best friend of a laptop table from Ikea, Dave. Height adjustable, tiltable and so so birdlike, I loved the idea in my mind. With a little cleaning, some paint and a simple transplant of hardware he was born. Without any further explanation, let me introduce Blue Footed Bobby.

    See more of the Blue Footed Bobby.

    ~ keeley d., ontario, canada


  • Say hello to my little (speaker) stands!

    Materials: Ikea Shoe Rack (Lustifik)

    Description: First and foremost I have to qualify/justify why I made these speaker stands (before the audiophiles out there cry blasphemy and take me for a fool not understanding the need for a $300 USD stand with zero resonance and spikes/cones for legs)

    1) I needed to space out the speakers on my system to create a larger soundstage.

    2) To me speaker stands are glorified stools

    3) I don’t have a proper workshop. (Over here in Singapore we live in tiny 3 room sardine cans which we spend our whole life’s paying for). And as such anything I would do to modify/hack had to be simple.

    4) Did I mention I think speaker stands are just glorified stools?…I ain’t gonna pay $300 USD for stools!

    So, one Friday afternoon I spent my time walking around my friendly Ikea store..I had been inspired by other cool ikeahacks (ie. Sexy legs stands, lamp/stands..) and wanted to do one myself…

    Lo and behold! $6 USD shoe racks!..And at the optimum floor to sitting ear height of 60cm!

    The mod work is rather simple.

    1) Open and assemble said racks (you don’t really need to follow the provided 1 page manual)

    2) Cut a wooden board to fit the top where the speaker is going to sit on

    3) Spray paint the whole thing midnight black ($1 USD can of spray paint)

    And voila!…Speaker stands!…with a greatly expanded soundstage to boot and only for what…$13USD!!!!!

    I’m sold!…

    ~ Lucas


  • Rusty room divider

    Materials: Expedit 2×4, Expedit 4×4

    Description: It all started with placing two Expedit units on top of each other; I ended up with something very colourful. There are way too many stages in this project to explain it all in 5 pictures. If you’d like to see more, go here.

    1. As I wanted to separate my dining table from my office I fixed two Expedit units on top of each other, with on the wallside a small storing space (for long objects).

    2. Even though it was very functional, it still looked very much like, well.. two stacked Expedit units. And I wanted something a bit more groovy. Also, I wanted to separate my office/work room a bit more.

    3. Adhesive plastic foil was used to stick on the insides of the compartments: yellow, orange, blue and black, in a semi-random fashion.

    4. From 2 large sheets of 4mm MDF new fronts were made, covering more compartments on the side of the dinner table, so I could use them for office stuff without exposing it in the living room.

    5. More MDF parts were attached to it, creating a doorway on the right, and a large mirror on top, right under the ceiling.

    6. The sides of the expedit unit were covered in black adhesive plastic foil.

    7. The fronts were treated with a paint that has iron particles. After that a couple of layers of acid (ferrochloride) were applayed to make the iron rust very fast (within a couple of days). The rusty metal gives it sort of an industrial feel.

    8. There are 4 “tv shaped” compartments with a removable panel, which fit exactly an LP record cover, so I can make some changes to it every now and then.

    See more of Bram’s Expedit room divider.

    ~ Bram D., Netherlands


  • Pretty Kitty Potty

    Materials: Lack and Anno Stra screens

    Description: I was looking for a way to provide kitty potty privacy and also take away from the “look, this is where my cat poops” decor of the living room of our condo.

    So, I took two Lack tables, and one roll of Anno Stra window screens, as well as some sticky backed velcro.

    1)Assemble the tables
    2)Measure the screens to fit between two legs of the table and adhere with sticky velcro. I used velcro in case there was damage to the screens. (Who knows what kitties will like to scratch!)
    3) Repeat to cover 3 or 4 frames, creating a tunnel beneath the tables for for the kitty litterbox and the mat that wipes their paws.

    Easy as that! The cats, I believe, appreciate the privacy and it creates a new surface for coffee table books, our Aerogarden, or couch throw blankets.

    If you litterbox doesn’t fit I thought about adding casters also to make it easier to pull in/out to clean the litter.

    Enjoy!

    ~ Fraser, Bethesda, MD


  • LACK of style

    Materials: 2x LACK shelving units, 2x LACK small shelf, 1x LACK large shelf, 2×3 GRUNDTAL spots and dimmer

    Description: The inspiration came from a trendy furniture store where they had this white furniture in front of this blue-green wall. As it was way over my budget, I had to improvise: enter the Ikea LACK shelves.

    1. I used 2 LACK shelf units and 3 LACK shelves and a number of MDF panels.

    2. Two green neon tubes were built inside the LACK shelf units as well as 6 GRUNDTAL spots on 2 dimmers.

    3. All the cables go behind the MDF-panels, covered in white fake fur, which are placed ~2cm in front of the wall.

    4. from 4mm MDF boards I made new fronts for the lack shelf units to make the 4 compartments somewhat look like old-school tv screens.

    5. The top and sides of the shelf units are laminated with white plastic foil, so they look like they are made out of one solid piece.

    Voila! I’m so happy with the result that I sometimes close the curtains just so I can put on the lights in my shelf. 🙂

    See more of Bram’s stylish Lack.

    ~ Bram D., Netherlands


  • From bland Ikea dresser to kiddy delight

    Materials: Rast chest of drawers

    Description: This started life as a paint job gone horribly wrong. Eventually, after I hid the thing in the closet for months, I decided to give it a second try.

    I sanded down the whole thing to get rid of the bad shellack job (not mine), then gave it 4 coats of paint and one coat of clear lacquer. I primed two of the drawers and covered them with fabric using Mod Podge Hard Coat. I also covered the top of the drawer pulls with scraps of other fabrics.

    It went from “hide in the closet” to “kid’s delight”.

    You can see the step by step process here.

    ~ Clara, PuntaCana


  • Super swank wall-o-shelves dresser

    Materials: Expedit bookcases, Lekman bins

    Description: We had two of the big daddy Expedit book cases and were using them with Lekman bins as a dresser. As you can see, it’s not so hot looking to be able to see all of your clothes and such through the plastic, so we decided to make fronts. We bought foam core board, and cut them to size. I bought some really cheap cream burlap (like 2 bucks a yard) and we used a spray mount to cover the boards with fabric.

    Then we hot glued them to the front of the plastic bins.

    I ordered some vintage nobs on ebay. We poked holes in the center of the boards and used a super ghetto combination of washers and cardboard to connect them through the center holes of Lekman boxes.

    Does that make sense?

    Voila…super sleek looking storage with no socks showing through. Go ikea!

    ~ Alyssa, Los Angeles,


  • Tableformer

    Materials: Lack, Broder

    Description: My son finally deserved a desk. He’s a Transformer fan, and I had some Lack shelves to be recycled. The structure is made of Broder rails and cantilevers, the desk itself with the shelves, silver and red, in perfect “transformer style”. The height of the working surfaces can be changed following child growth.

    I bonded the shelves toghether with a screw bar tightened by nuts. Note how the bar fits in an existing channel (if you ever mounted a Lack you know what it’s for), so you don’t have to drill much. Then I screwed the shelves to the cantilever. The result is sturdy enough, I climbed on the desk just to check. The front edge has capped nuts, and it looks pretty neat.

    See more here.

    ~ Andy War


  • Jeweler’s Jam

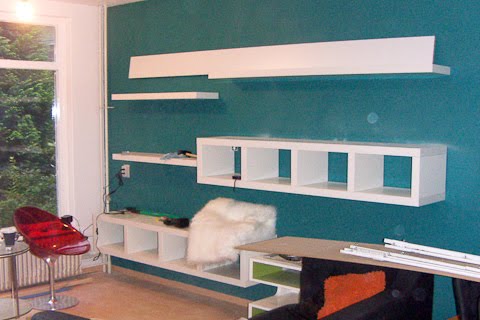
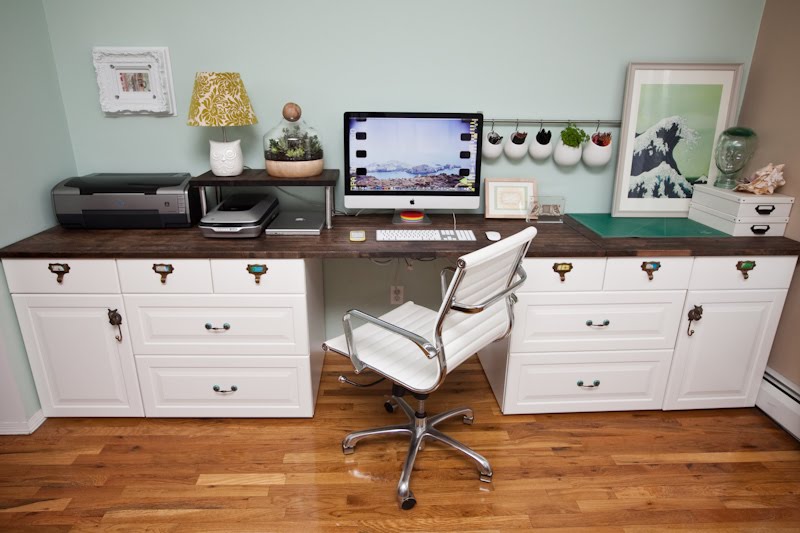
    Materials: (1) Helmer drawer unit on casters, (1) Vika Amon table top, (1) Hyllis shelving unit, (2) discontinued Ikea shoe racks, (1) Lack shelf, (1) Kolja mirror. The only extra hardware needed were some standard screws, drywall anchors and four small L shaped brackets.

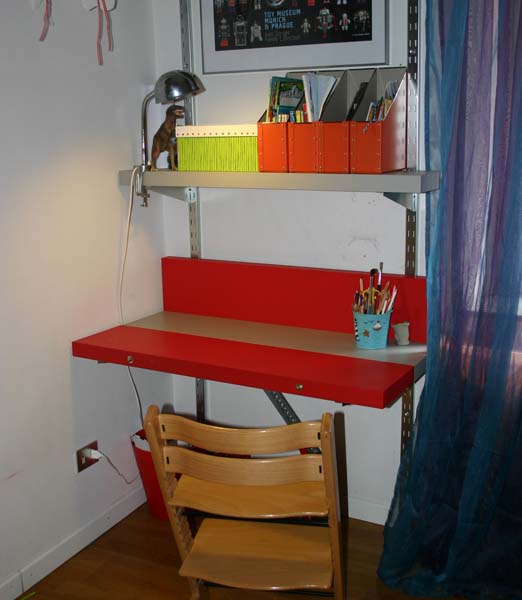
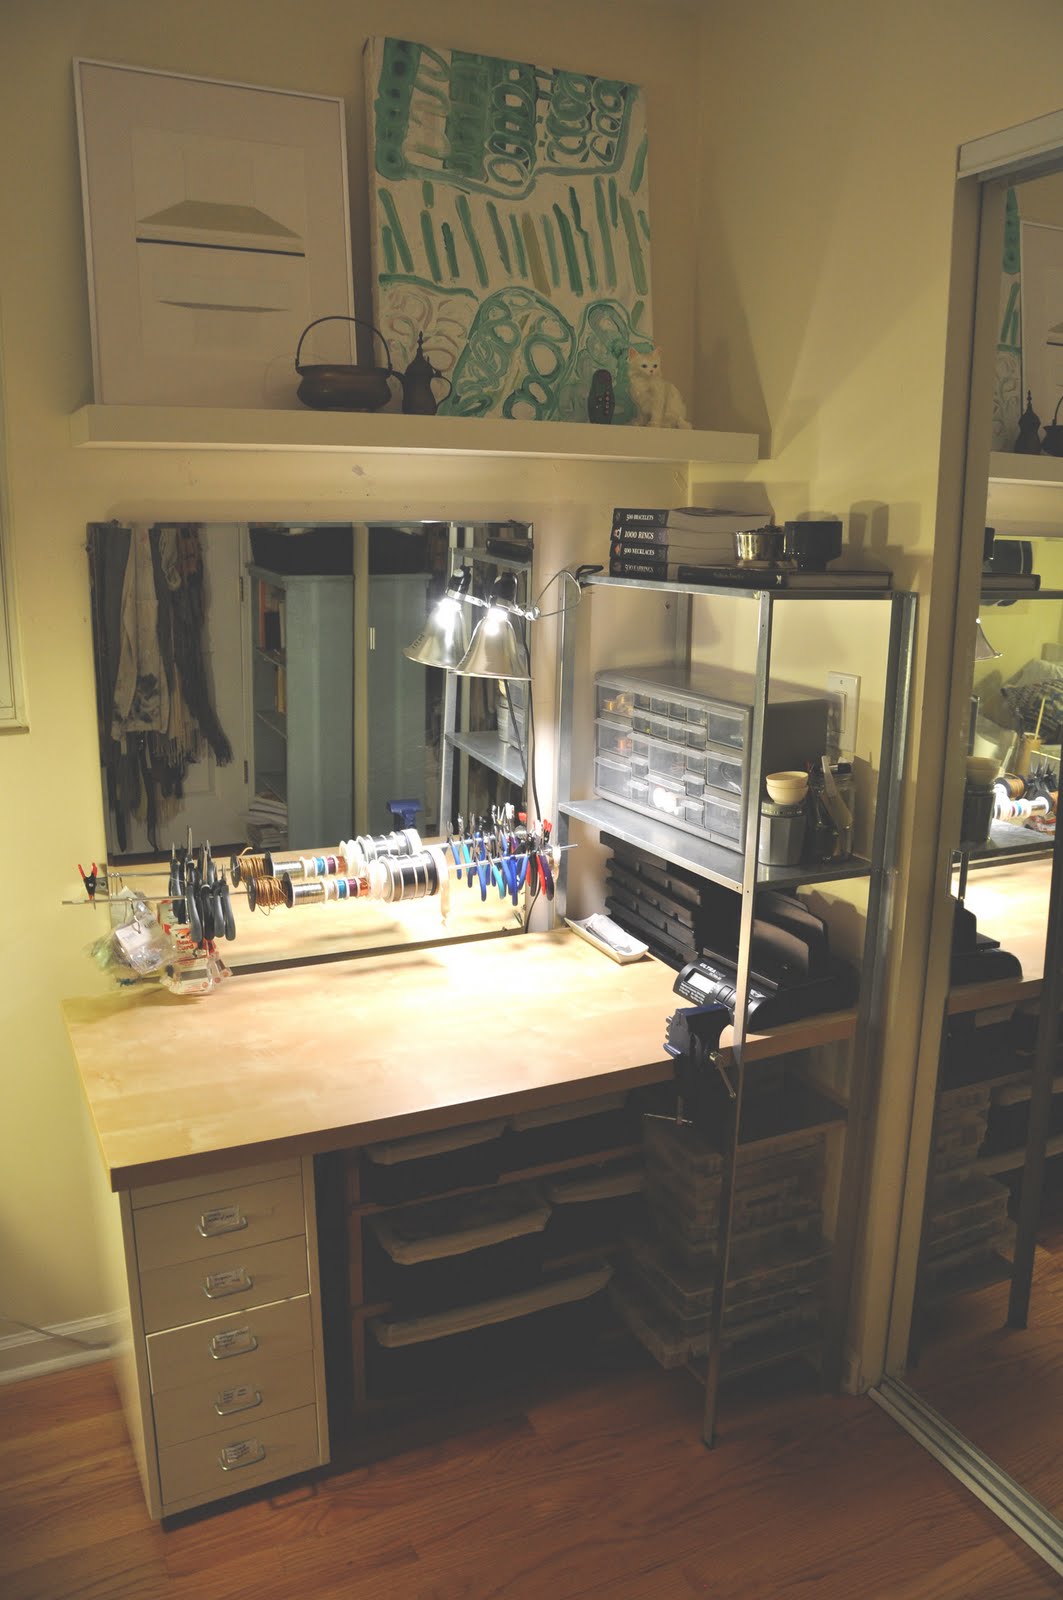
    Description: I design jewelry and work from my bedroom, where I already have a huge Vika Gruvan desk, an overflow of bookcases and no extra room to spare. So this action-packed little corner was pretty much my only option.

    I also had no cash at the moment (Hey, not all of us can be Tiffany) so buying brand new furniture was out of the question, all the Ikea items I used were bought on Craigslist. I think I spent less than $40 total including hardware.

    Here’s the steps so you too can do the jam:

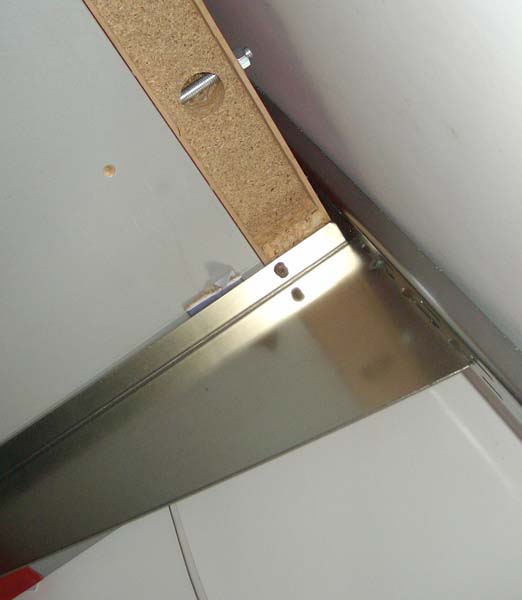
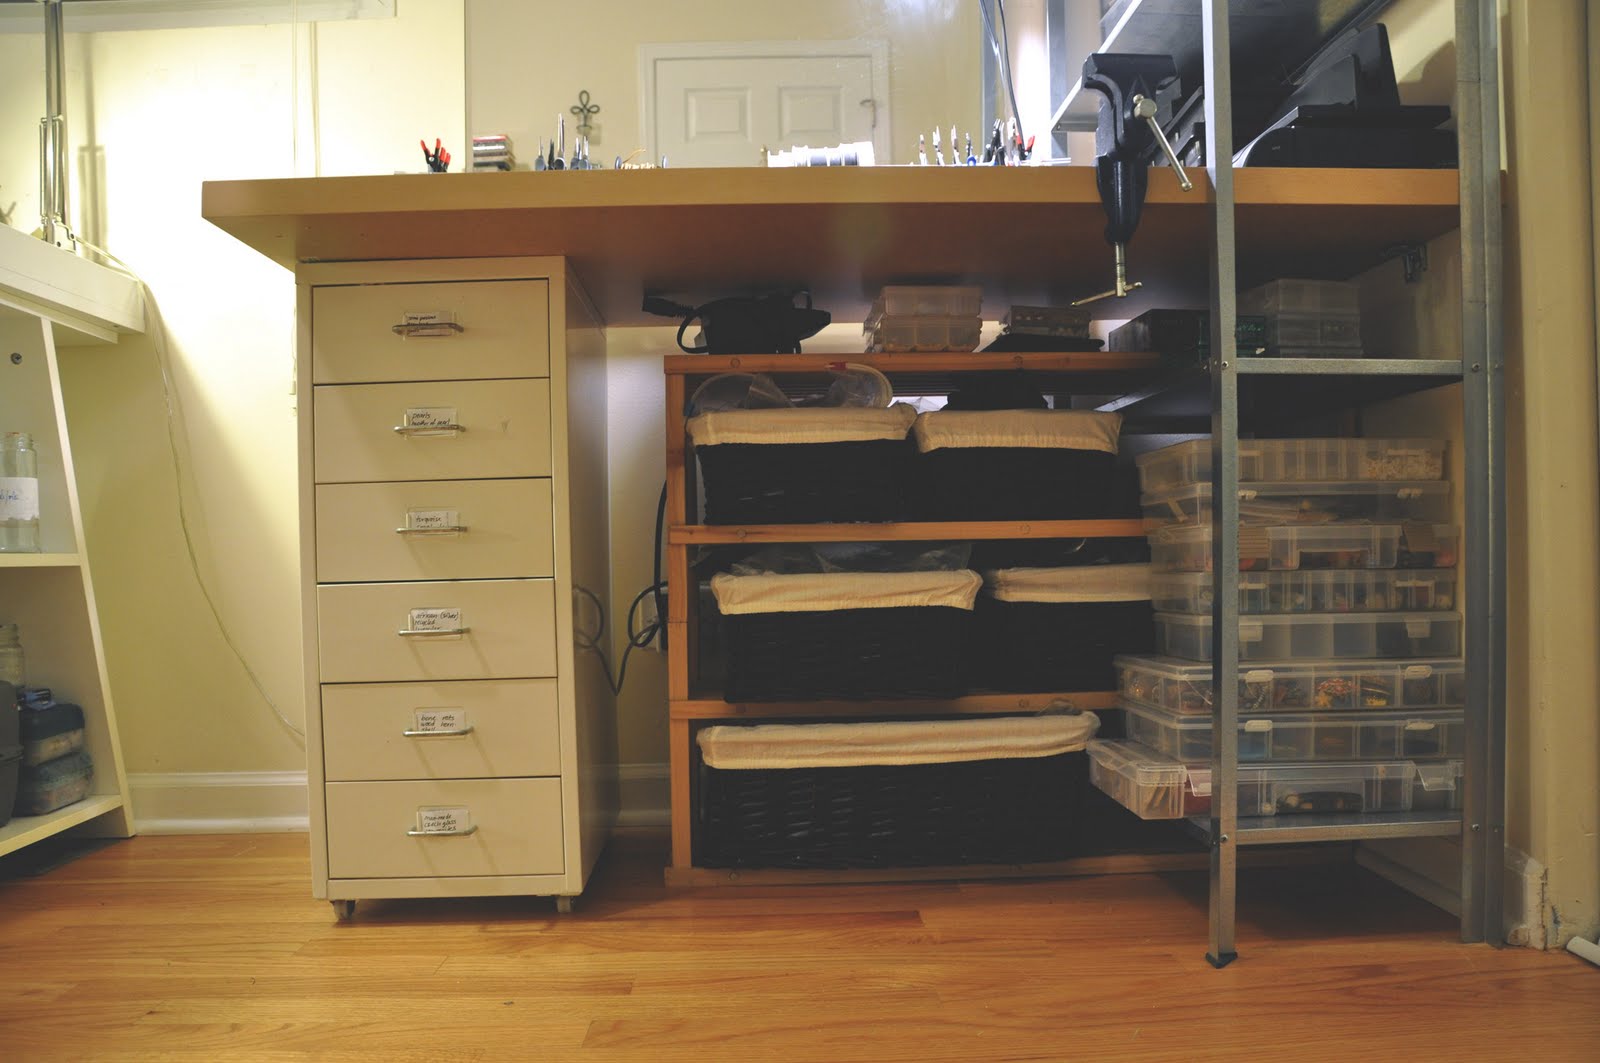
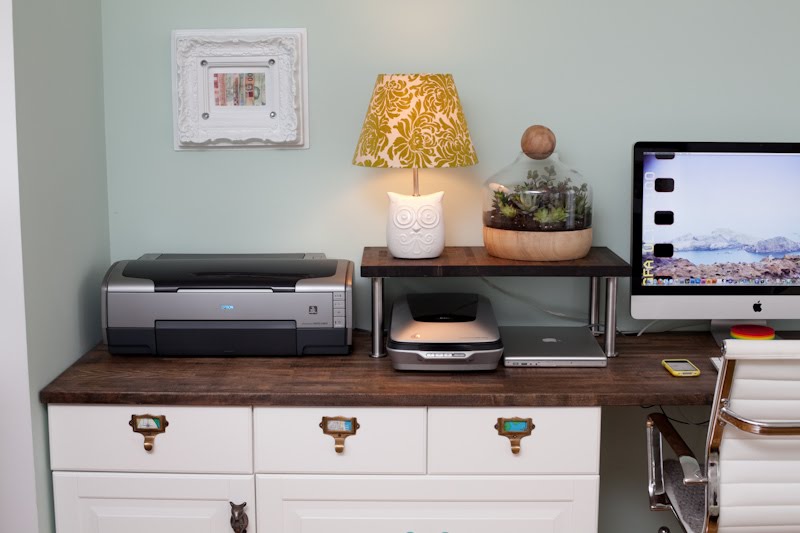
    First, I assembled the Helmer drawer unit. Then, using its height as a guide, I attached the L shaped brackets to the wall. (As you can see in the picture, I used some left over curtain brackets from another project to keep costs down.)

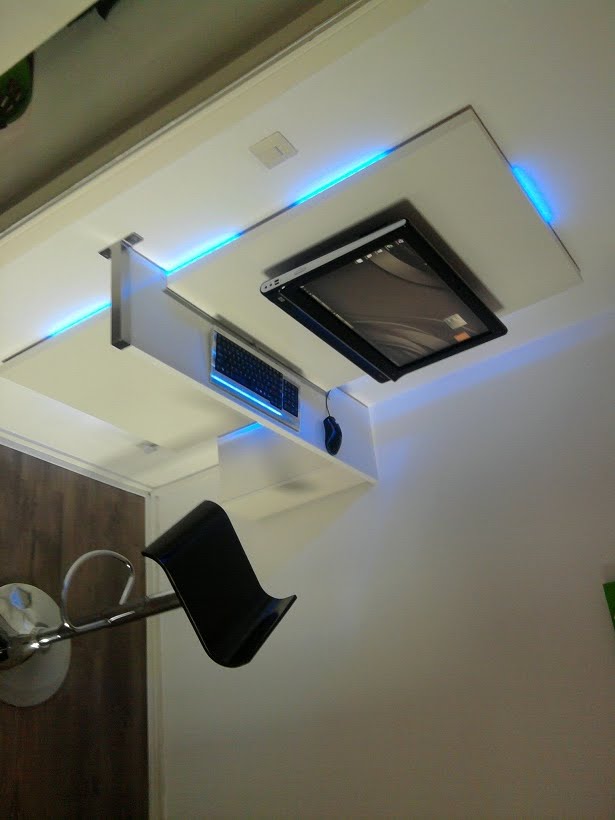
    Next, I assembled the Hyllis shelving unit. Here is where I had to work some magic. The table top is wider than the shelves so in order to slide it in place without having to cut the table down to size I had to invert the Hyllis’ legs. This seriously compromises its stability, so I had to anchor it to the wall. After that, I slid the table top in place and secured it to the brackets with screws.

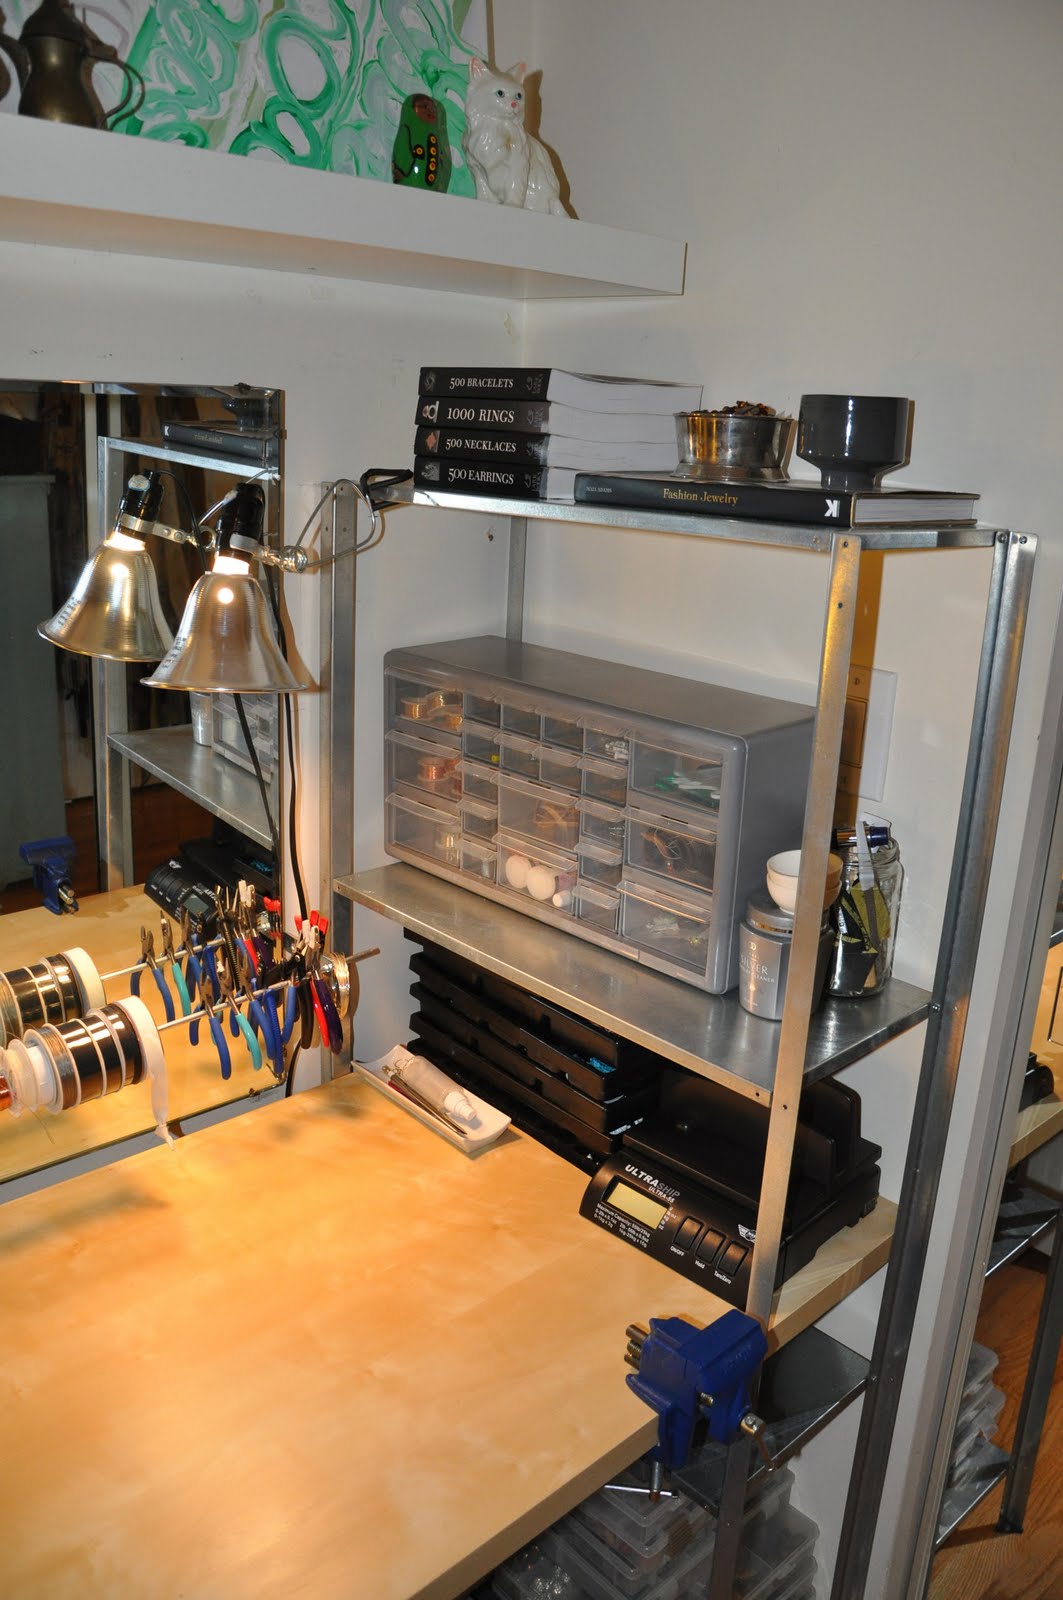
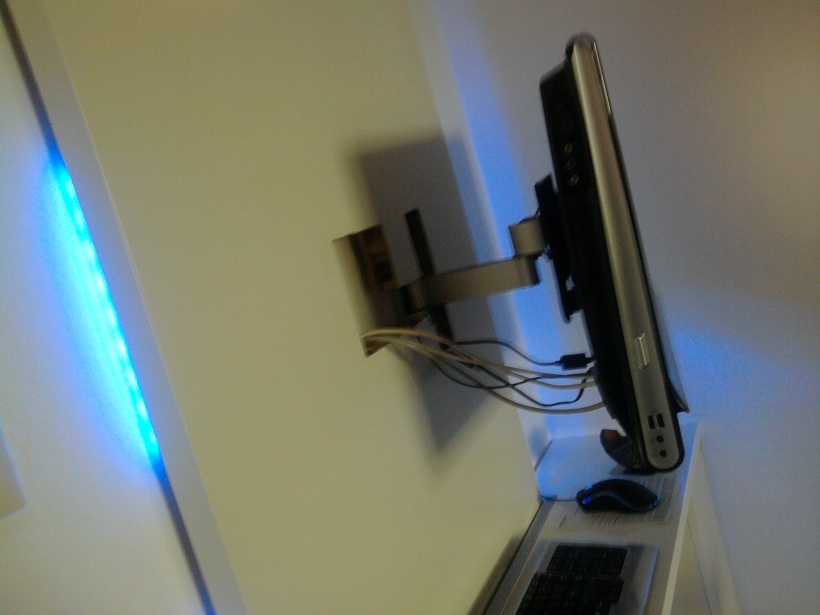
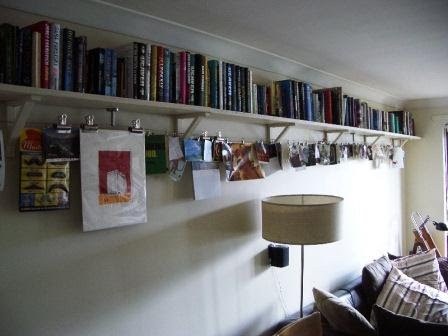
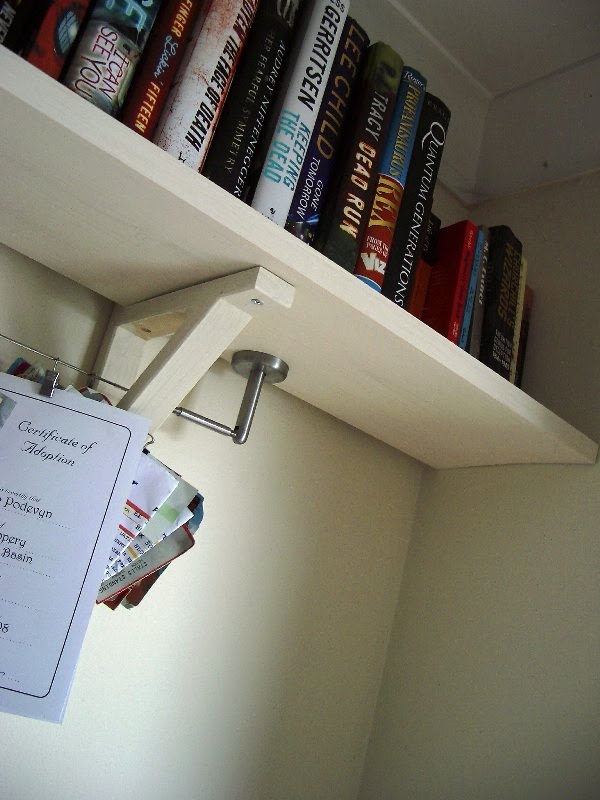
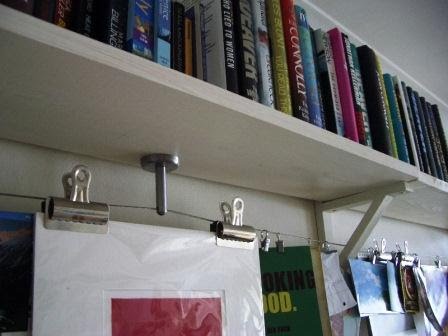
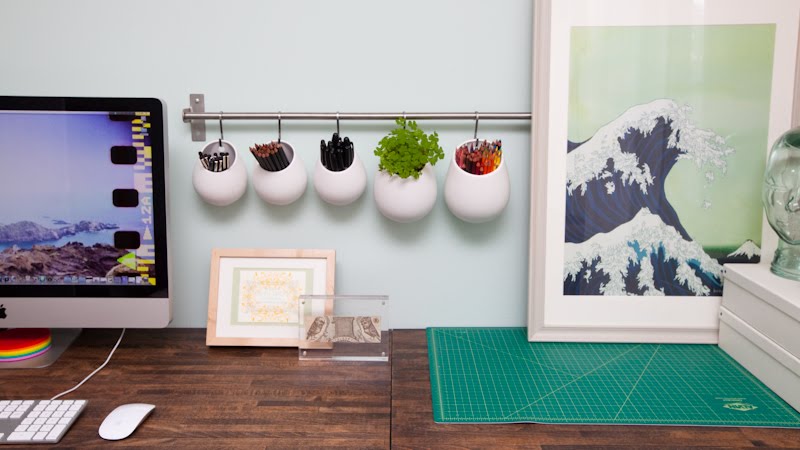
    Then I hung the mirror (No, I’m not -that- vain, I just need to look at my work!) and the Lack shelf. As an extra bonus I installed a wire/tool dispenser made of L shaped brackets and a steel rod (Costs $2.50 to make). Since I still needed more shelving I added the shoe racks underneath the table. I bought two of them and stacked them, going under and around the Hyllis unit, then secured them with screws.

    And that’s pretty much it.

    Hey, it is not the sexiest of units, but it works for me. Plus it was $40 bucks. Beat that.

    ~ Sunny H., Chicago


  • Tension Rod Hanging Lamp

    Materials: Tension Rod, Ikea Hemma Lamp, Zip Ties, Light Bulb

    Description:
    1. Using zip ties, secure the wire from the Hemma Lamp to the Tension Rod.

    2. Hang the tension rod in the desired area and zip tie to cord to the wall post or to brackets.

    3. Plug in and…let there be light!

    ~ Brianne, Great Neck, NY


  • Wall mount computer workstation, pc desk

    Materials: Ikea: VIKA AMON tabletop (150 x 75cm), EKBY BJÃRNUM bracket, EKBY JÃRPEN shelf (119 x 28cm), MALM nightstand (white), 2 x DIODER multicolor LED-strips. Non-Ikea: HP Touchsmart600 (computer), Vogel’s Wallmount, 2 x Aluminium decorative strips (100cm), One ordinary shelf bracket, 2 hinges, Enermax Crystal aluminium keyboard

    Description: First I made a frame with 4 slats on the back of the tabletop to move it about an inch from the wall. Then I made a hole in the tabletop for the flatscreen-wallmount. (The tabletop isn’t strong enough to hold the screen, so I put the Vogel’s wallmount straight on the concrete wall.) After that I put the DIODER LED-strips on the frame behind the tabletop and hung the tabletop on the wall with wooden slats, a bit like this.

    I took the EKBY JÃRPEN shelf and sawed a piece out of it to fit over the tabletop. Then I made a little cupboard for the cables from an old MALM nightstand and screwed it to the EKBY shelf. I made a door in the cupboard with 2 hinges and a little shelf inside.

    Then I put the shelf on the wall with one EKBY BJARNUM bracket and one ordinary bracket inside the cupboard.

    And as a finishing touch I put the aluminium decorative strips between the EKBY shelf and the tabletop.

    I hope you’ll like the result!

    ~ FritZz81, Netherlands


  • Magic fabric

    Materials: 6.5 yards of Majken fabric

    Description: I folded the fabric directly in half and cut down the fold, making the two panels.

    To hem each side, I used Stitch Witchery. I followed the steps on the back of the packaging to adhere the 1/2″ hem on each side. No sewing machine for this project!

    I stapled one end of each panel to a thin 1×4″ (only $2!) that my husband cut down slightly narrower than the width of the panel.

    Then I coaxed him into using our extension ladder to scale the 18 foot wall, all the way up to the ceiling and screw the 1x4s into the wall. To make his life easier, and less death defying, he pre-screwed about five screws into each piece of wood so that he could use one hand to hold the 1×4 on the wall and the other hand screw the screws in. After securing one screw, he said that is was much easier to screw the others in because he didn’t have to hold the panel up anymore and could put all of his force into the other screws.

    One little tool that made the hanging process a breeze was this little laser level that I bought for him a few years ago. Rather than measuring placement on the wall at the top of the ladder, we propped this guy on the mirror and he beamed a straight and level line all the way up to the ceiling.

    A short while later, both panels were hanging and after about 30 seconds of staple-gunning were tacked to the wall.

    See more here. Also check out Jessi’s Poang chair repainting and Bonde TV unit turned sideboard.

    ~ Jessi @ The Design Slice, Chicago, Illinois


  • DJ Stolmen Studio

    Materials: STOLMEN, LACK, EXPEDIT , SIGNUM, KOMPLEMENT (Shoe Rack)

    Description: It took me 2 weeks to design this Stolmen DJ Studio. I have downloaded the tool from IKEA site and used it to design and visualize what I’ve wanted.

    1. I installed 4 STOLMEN Post without drilling.

    2. I place the EXPEDIT Shelving unit with all my Vinyl Records.

    3. I installed the STOLMEN Shelves 1 on top of the EXPEDIT shelving unit then the others.

    4. I installed the STOLMEN Shoe Rack to use for MacBook Pro.

    5. I installed all 4 LACK Shelves and screwed the sides of the LACK Shelves on the STOLMEN mounting fixture to give more stable support.

    6. I installed 2 metal plates on the wall and hooked the KOMPLEMENT shoe rack (Slanted) on top of Rack shelf (For Mic Mixer and Trigger Finger).

    7. I installed the STOLMEN hook to hang Headphones.

    8. Finally, I installed all DJ gears , PC and accessories, I used SIGNUM cable organizer and Velcro to organize power supply and cables.

    ~ Mitch aka DJ MX3, Dubai, UAE


  • Contemporary display shelf

    Materials: Expedit 2×4, glass inserts, legs, drill, shelving brackets

    Description: Here at Salon Vivid, we are remodeling our salon, and wanted product display shelves to match the contemporary feel we are trying to achieve. Not being able to find exactly what we were looking for, we decided to get creative!

    We purchased the 2×4 Edpedit in white from Ikea. To have the products at an eye level for our clients, we supported them with 3 ft. legs we found online. To attach the legs, we screwed them into the bottom of the shelving unit.

    We also wanted the merchandise organized for easy recognition. We decided to insert shelves so our travel sized products would be located next to the full sized products. We ordered custom made glass shelves to fit the dimensions of the cubes. To apply the shelves, we drilled holes and inserted shelving brackets to support the glass.

    We love the shelves, especially how they fit the needs of our salon. Also, we receive many compliments on them from our clients!

    ~ Salon Vivid (Phiet), Webster, Texas


  • PS Spraka (Spice Mill) Hack

    Materials: IKEA PS SPRAKA Spice Mill Black Qty 3

    Description: Inspired by the modern design aesthetic of Marcel Wanders‘ New Antiques Collection and Front Design Group’s IKEA PS SVARVA Lamp, I realized that there is really Great design in Ikea’s latest Collection. So I decided to apply my own spin and create a coffee table.

    1) Qty 3 Ikea PS Spraka Spice Mills in Black
    2) One 33 inch round by 1 inch thick white laminate top
    3) One 36 inch round Ogee edged glass top
    4) 2 feet by 2 inch unfinished wood crown molding with a slight angle cut into 8 inch pieces (The angle helps to tilt the Spice Mills out just a bit to take the table from ordinary to inspired.)
    5) Three 2 1/2 inch wood or mdf screws
    6) Twelve 1 inch wood or mdf screws
    7) Three clear silicone self-adhesive bumpers
    8) 120 grit sand paper
    9) Gorilla Glue
    10) Permanent Black Marker

    Process
    1) Pre-drill one hole in each spice mill 1 1/2 inches from the bottom end of the mill. Drill at approximately 60 degree angle in order for the drill bit to exit near the center of the base. Touch up drill holes with the permanent marker. (You will have to allow for countersinking the screws)

    2)Take the 3 – 8 inch pieces of crown molding and center them on the bottom of the Spice Mills, apply a little glue if you like. Then take 2 – 1 inch screws and attach the molding angle side down to the spice mills.

    3) Measure and mark placement of each of the 3 Spice Mills on the underside of the white table top.

    4) Now sand the laminate table where attaching the three 8 inch pieces of crown molding. Apply a line of glue to molding then place them unfinished side down and screw into place with 2 – 1 inch screws equally spaced. Then secure each leg with a 2 1/2 inch screw into the bottom of the laminate table.

    5) Leave table upside down to allow for the glue to dry.

    6) Invert newly constructed table, mark placement of the silicone bumpers and attach them.

    7) Place the 36″ clear glass top inverted on the table.

    ~ john b


  • From Butcher Block to Vanity for Two

    Materials: Groland Butcher Block Island

    Description: When we moved into our condo, the one not so great feature was the tiny master bathroom – 45 sq. ft. total! In order to shoehorn in a 2 sink vanity (and not break the bank in doing it), we decided to make our own.
    (1) After assembly of the butcher block island, we cut two sink holes in the top. This was no small feat since the top is a real butcher block about 2 inches thick!

    (2) We stained the whole piece w/clear lacquer to protect it from bathroom moisture;
    (3) Spray painted side of butcher block and lattice shelf (for a li’l pop);
    (4) We hand-tiled the whole butcher block top with li’l iridescent glass tiles (which match the shower accent tile);
    (5) Installed two drop-in stainless steel sinks and single lever/hole faucets.
    (6) Had a plumber hook up a T-line junction from the one existing water line/sink drain and voila!

    We had our own custom 48″ 2 sink spa style vanity!

    ~ Mel Jenkins, Los Angeles


  • Beam me up Scotty

    Materials: Ikea Mobile+Ikea cable light parts

    Description: An old IKEA mobile is Transformed into a light by the simple addition of wires and two IKEA 12 volt cable lights.

    ~ Vlasis Albanis, USA


  • Book up top, rail below

    Materials: Ekby Valter brackets, Dignitet curtain rail system

    Description: Spanning about 5m, this is a practical book shelf at head height with an integrated rail for clipping photos, postcards or basically any signiciant tosh lying around your flat.

    I used 7 Ekby Valter brackets spaced at about 0.8m centres. Timber was supplied from my local timber merchants (ie not Ikea!) and painted, as well as the brackets before fitting to the wall. The Dignitet rail system is then attached to the underside of the shelf and threaded through the brackets. Curtain clips or some beefy bulldogs (not Ikea) used for hanging larger items.

    ~ Pods, Newcastle


  • Custom Command Center

    Materials: Akrum base cabinets (two 30″ with large drawers, two 18″ with cabinets), two lengths of Langan countertop (96″ and 49″)

    Description: As a photographer, designer and artist, I was in need of a desk solution that would accommodate all my computer/camera equipment and peripherals, plus tons of storage for materials and supplies, and with extra room on top to spare so that it could actually be used as a work/craft surface.

    While I am lucky to be blessed with the space for an 11-foot desk, sadly no such product seemed to exist. I headed to the Ikea kitchen section for answers. 4 Akrum base cabinets and 2 lengths of Langan wood countertop solved the problem. The cabinets are designed to sit on legs (keeping them flat on the ground would mean the bottom drawers and cabinets would scrape against the floor), but to avoid extra height I decided to forego the legs and instead placed a few pieces of 1/2″ plywood underneath to lift them just enough.

    I needed a 132″ top, and decided to create it out of two lengths of the Langan. The pieces were cut, sanded, stained, and waxed; with the excess used along with the set of Capita stainless steel legs to make a shelf. A hole was cut in one of the pieces to allow cords to pass through.

    Even without the cabinets sitting on legs the desk is still several inches taller than normal desk height (32″ instead of 28-29″) but an adjustable-height chair solved the problem.

    Since the drawer and cabinet faces are not pre-drilled, I was able to choose interesting hardware from another source for the pulls and handles (library card catalog pulls, which I filled with bits from vintage NYC street maps).

    ~ Steph Goralnick, Brooklyn, NY