Author: Jules

  • Ikea Bekvam step stool chic

    Materials: Bekvam stool, oilcloth, primer, paint, staple gun

    Description: Step one: Use sugarsoap to remove any grease/stains etc.
    Step two: Prime it using two coats
    Step three: Paint with two coats of paint (here Dulux brilliant white)
    Step four: Trim material to fit top (I’ve used Cath Kidston oilcloth)
    Step five: Turn stool upside down and staple into place with a heavy duty staple gun.

    See more here.

    ~ Camilla, London, UK


  • Stefan Rocks

    Materials: 2 Stefan chairs

    Description: The chair is made from two Stefans, one cut in half and a 85mm slice of the other inserted into the middle of the first one. This makes the chair wider and more suitable for a rocking chair with arms. The front legs and rails of the second chair are used as the arms; the back legs of the second chair are used as the rockers. The resulting chair is comfortable and rocks surprisingly well.

    ~ Laura Mays, Connemara, Ireland


  • Big-Screen Bonde

    Materials: Bonde TV Bench with hutch and 3 bookshelves with 2 doors, saw, drill, palm sander, stain, polyurethane, fabric from Jo-Ann, double-stick crafing tape, window film from Home Depot

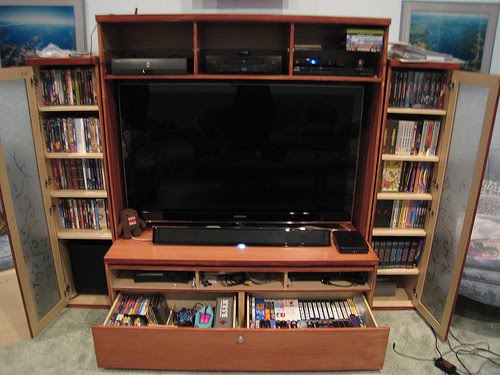
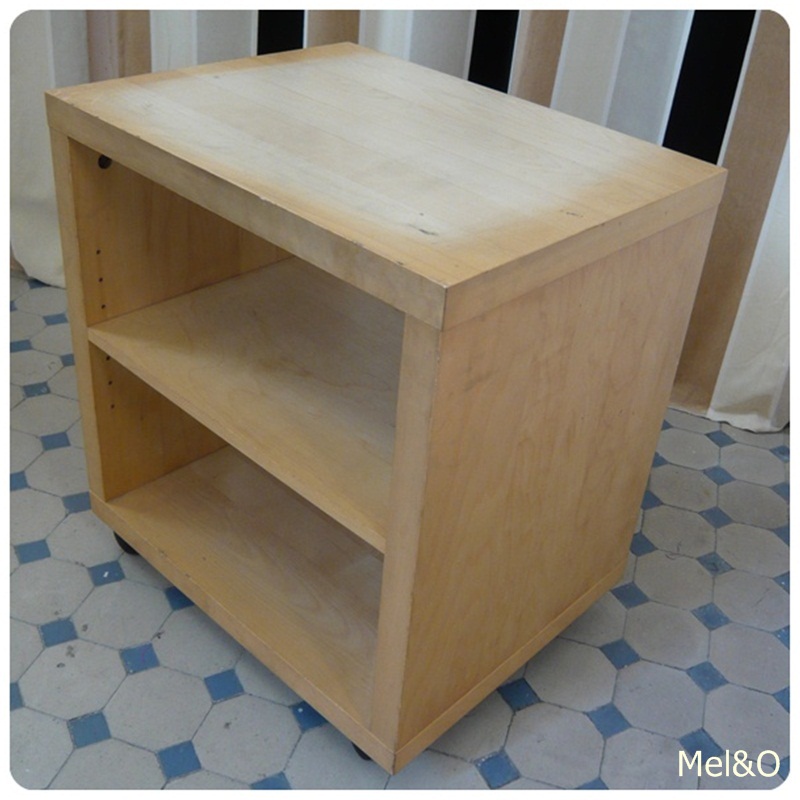
    Description: I recently upgraded from an old small television to a new huge one, and I needed a new entertainment center to put it in. I finally settled on a Bonde system on IKEA, in large part because it was inexpensive on clearance. The base system was the birch color, which I wasn’t thrilled with for my decor, and the hutch was wide enough but not quite tall enough for the new TV, so I thought I could hack it to make it taller. I bought the TV bench, hutch, and two side bookshelves with doors to store my DVD collection. On the way out I found another bookshelf without doors in the as-is section and nabbed it (at half off the clearance price!) to provide extra pieces for the hutch extension.

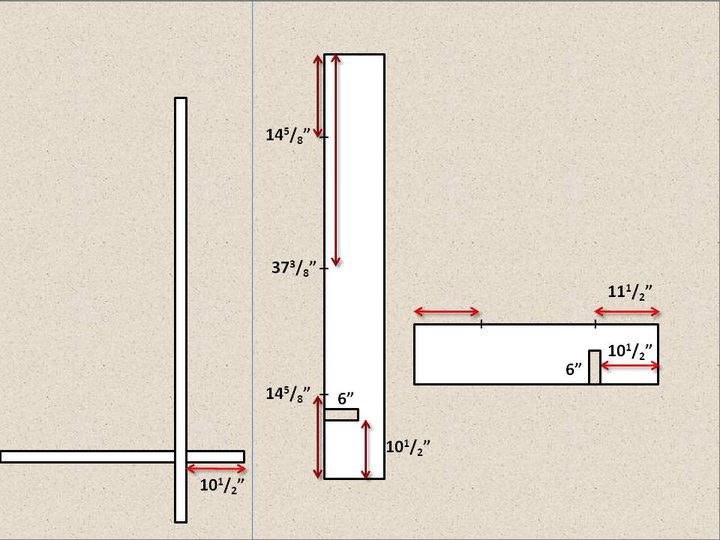
    First, I dismantled the sacrificial as-is bookshelf. The top became a stain-test piece, the shelves were set aside to use in the final bookshelves, eight-inch pieces were cut off the sides to extend the height of the sides of the TV hutch, and an eight-inch strip of the backerboard was also cut off for the hutch. The holes in the hutch sides were moved up to accommodate the new mounting location of the shelves at the top of the hutch, and extra holes were drilled in the new extensions to match the hole spacing for the glass shelves in the hutch.

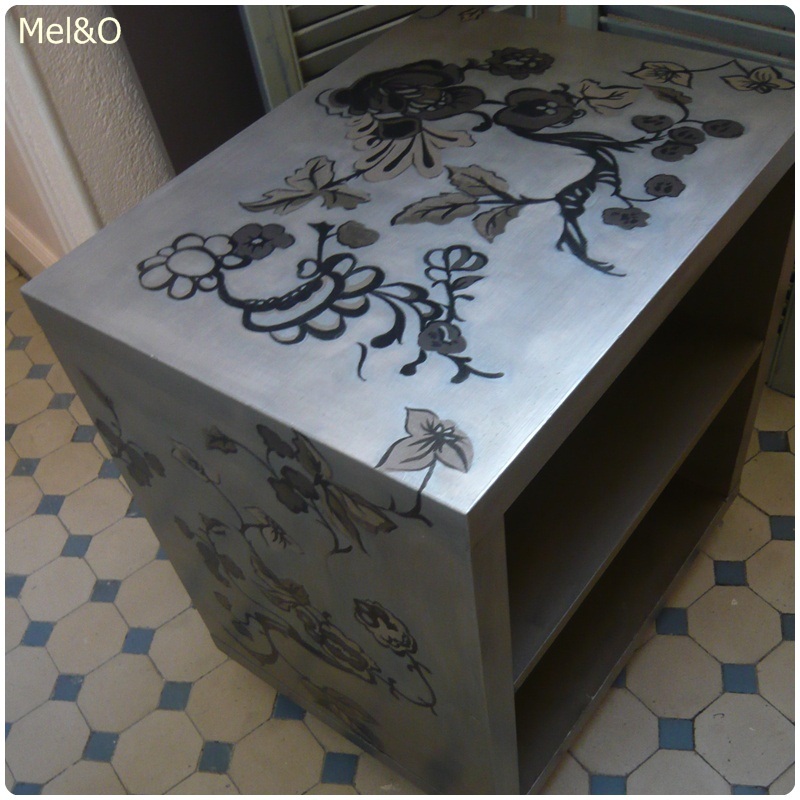
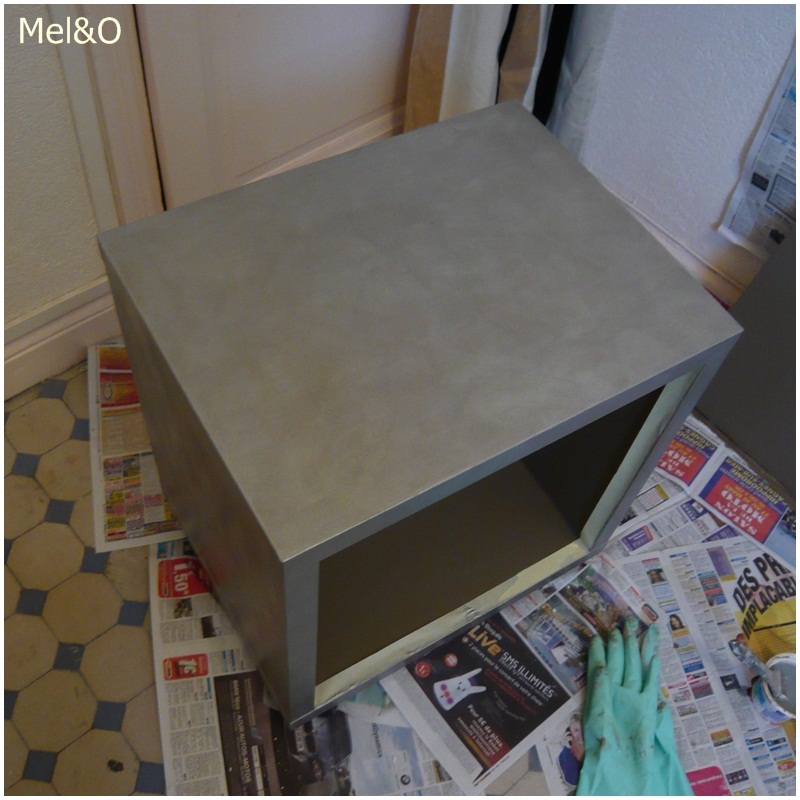
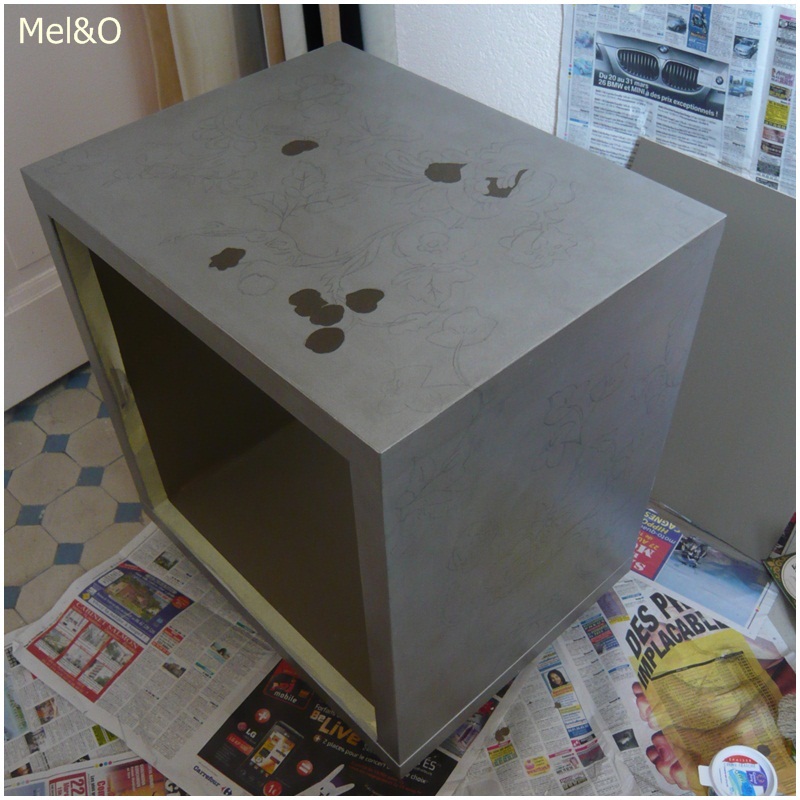
    Next, I spread all the pieces out on cardboard on my garage floor. Cam pegs, dowel pegs, and random plasticware from my cupboard helped hold pieces off the ground as necessary for edge and double-side staining. A light sanding of all the surfaces with 220 grit helped prepare the very thin birch veneer for stain, but it was easy to oversand. After wiping down all the dust, I applied two coats of Minwax stain in Red Chestnut color, though getting the color smooth was finicky work due to that thin thin veneer. I followed that up with two coats of satin polyurethane to protect the stain. It turned out that the recommendation to sand between coats was a bad one for this project due to the thin layer of stain, but luckily most of the parts I discovered that on aren’t very visible. I left all the surfaces that would be inside closed spaces the original birch color to save work and make the inside surfaces brighter. The doors ended up taking the stain differently than the rest of the pieces, but I did my best to even them out.

    After everything had dried really well, I assembled everything. The hutch side extensions were fastened to the top of the hutch sides with glue and dowel pegs. In retrospect, I should have done that before staining to ensure even colors, but live and learn. The fact that the extension joint lines up with the top of the bookshelves helps camouflage it. The backerboard extension was nailed onto the back of the hutch above the thick TV-mount backerboards and below the shelves, wehre it’s pretty well hidden by the TV.

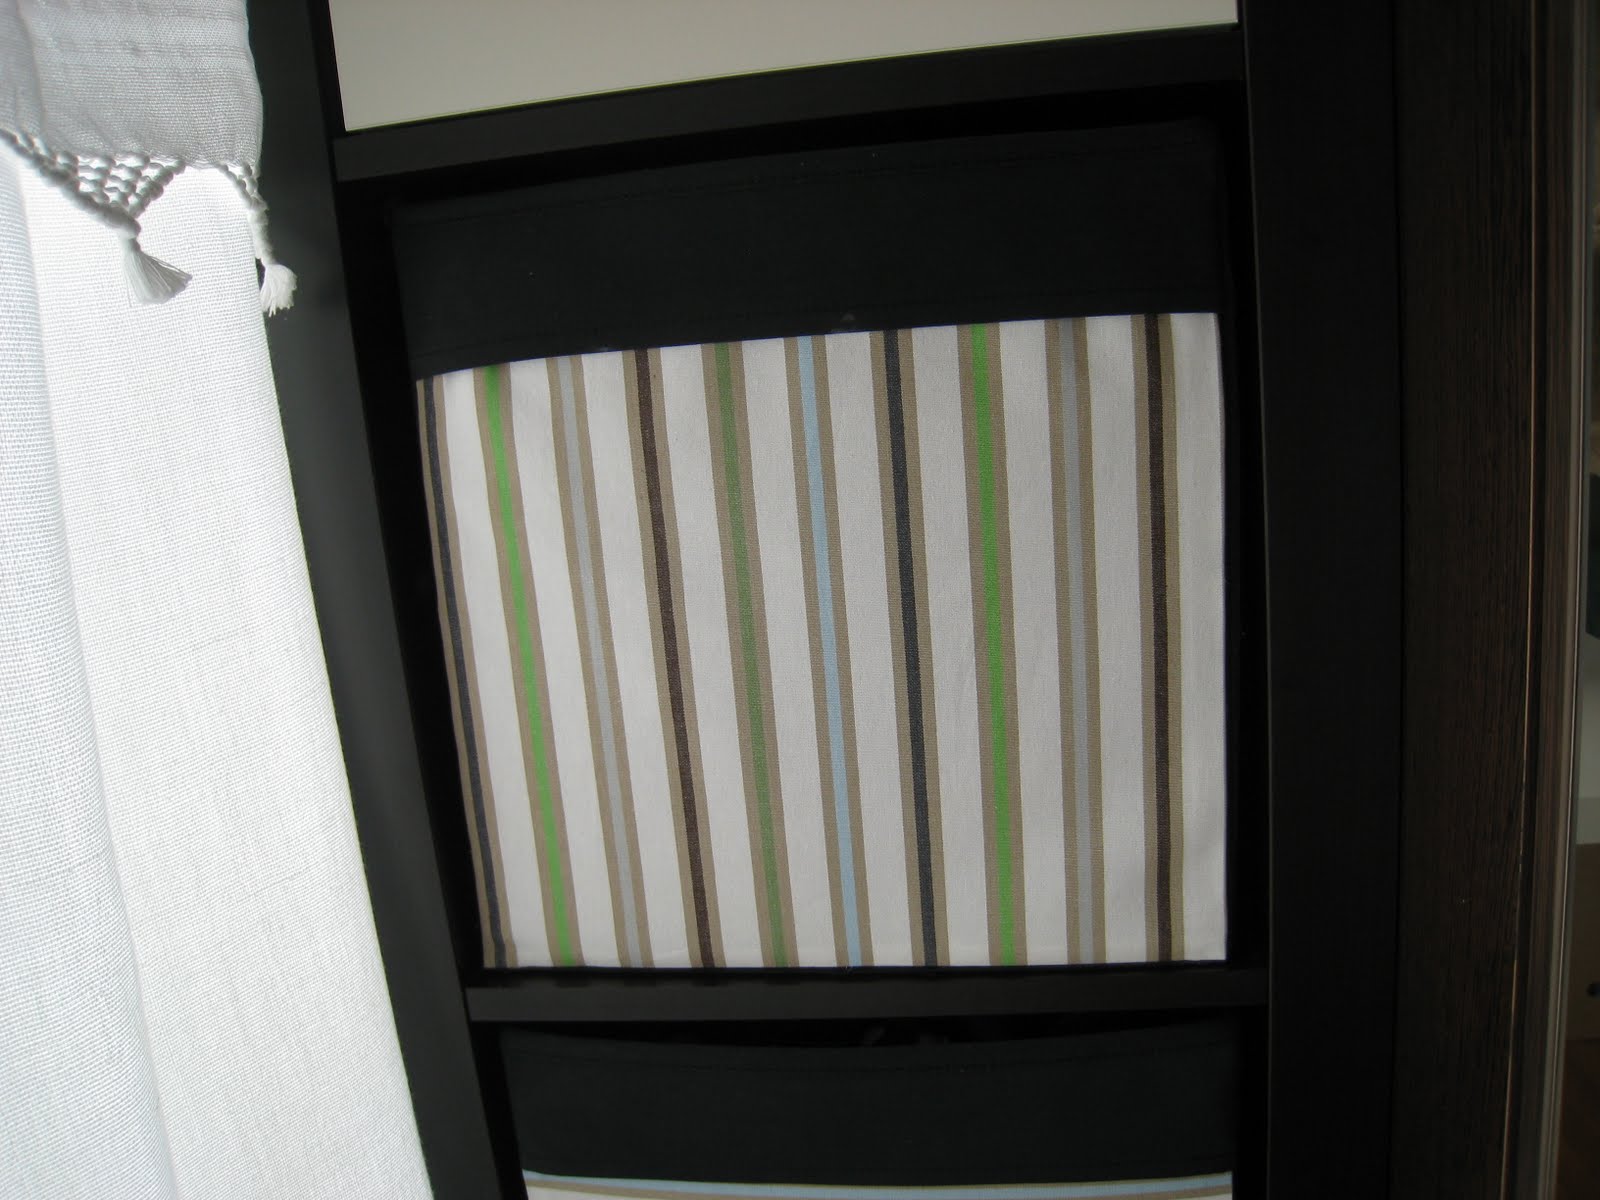
    Finally, I applied a translucent window film with a vine pattern (available at Home Depot and other vendors) to the bookshelf door windows, and on the backside of the doors I used double-stick crafting tape to attach pieces of midnight blue organza fabric with little gold nubbins scattered across it like stars in the night sky (found at Jo-Ann Fabric and Craft around Christmas).

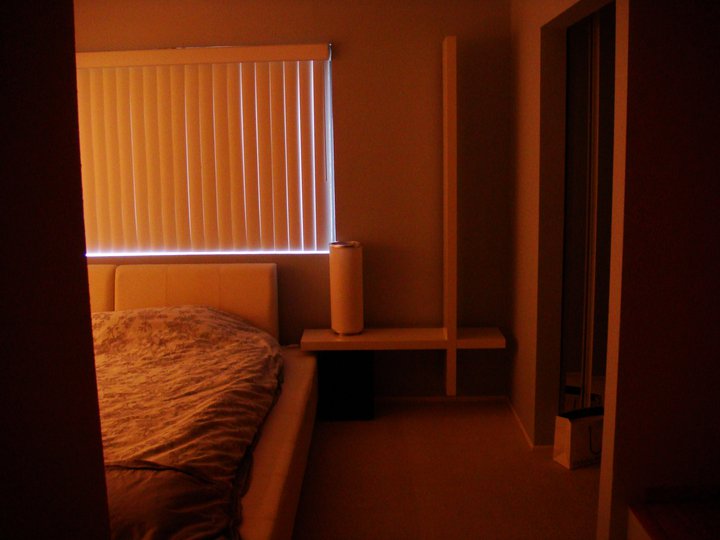
    DVDs and the subwoofer are stored discreetly in the bookshelves; the TiVo, VCR, and DVD player are mounted in the TV hutch for easy remote control; the big drawer in the TV unit has videotapes on one side and video games and oversize DVD sets on the other; and the door area of the TV hutch hides video game consoles, a UPS, and video and network switching equipment.

    See more here.

    ~ Amy, Houston, Texas, US


  • Hopen and Malm: Lights, Camera, Action

    Materials: Hopen Wardrobe Doors (2), Malm Bedframe (1), Indoor/Outdoor Potlights (2)

    Description: My old bed frame was broken so I replaced it with a MALM frame which nicely matched the dresser and bedside table I already had from the HOPEN line. However, I found the finished look to be too simplistic which is where the hack comes in.

    Using two spare HOPEN wardrobe doors that I had picked up from the “Ikea reject” area a couple of years ago, I framed my existing piece of artwork using the doors (side) and the headboard (bottom). Then I back-lit the whole thing. The lightening looks chic but it’s also very functional if you only need a bit of light.

    STEPS
    There is very little construction work required to achieve this look:

    1. Fasten the doors about 2-inches away from the wall (in order for the light to get in). You can either fasten them to the wall or to the bed itself. If you’re really lazy you can lean the door against the wall (braced by the bed at the bottom). I’m not sure if Ikea still has the HOPEN ddors but you can use anyones that match your existing furniture.

    2. Get some mini-pot lights from a construction store. They are about $20 dollars and are pre-wired – you just plug them in. They also come with a dimmer so you can experiment with the light.

    3. I wanted to incorporate my art, but you can do whatever you want in the middle of the two doors. I think a few more back-lit doors would look good but I’m sure there are tons of hack-worthy ideas…

    ~ Warren, Toronto


  • Ikea leftover’s garbage can with auto open

    Materials: Bolmen Garbage Can, Blanken Corner Wall Shelf, Deka Curtain Wire w/ Clips, Ikea Knob from Dresser, Grundtal Rail Ends & Rationell Variera plastic rail guide.

    Description: So when we moved to our new home I encountered a problem that I couldn’t find a garbage can that would fit under my sink, there wasn’t an auto open can small enough that could clear the pipes and such.

    I bought the Bolmen garbage can as a temporary measure until I found something better. But one day, with a flash of brilliance, I combined it with host of other items I had and made exactly what I wanted.

    The Grundtal Rail ends supply bottom support for the Blanken corner wall shelf to mount to with zip ties I had left over from some Ikea cord tubing I had bought.

    The can itself is held in place using a Rationell Variera rail guide that was an extra we got in a package, the groove of the can fits nicely into the groove of the guide.

    Lastly I used some spare Deka curtain wire minus the clips that was used for an art installation and fixed one end to the counter the other to the lid with just enough slack so when the door is opened the lid opens up.

    I used a knob from an old Ikea dresser we had to attach to the other end of the Deka on the underside of the lid to provide a bit of weight to assist the lid return when the door closes.

    Lastly I attached the can to the corner wallshelf with some screws, because sometimes when near empty the can would sometimes pop out and fall over.

    Sounds like a lot eh? It was actually pretty easy.

    ~ mcquarris


  • Elegant Engan catbox

    Materials: Engan 2 drawer 2 door, catbox, motion sensitive light

    Description: I followed the basic instructions but skipped the part about the drawers instead opting to use one of the side panels from a drawer to join the two drawer fronts together. Once attached using the 2 provided L bracket that were supplied + 1 other larger one I had bought at Ikea as well I mounted the drawer fronts to the unit.

    With all parts together I put the back on but only nailed the top part down to the middle then used a jig saw to trim off the bottom half, then jigged out the cat door oh so very carefully.

    The entry hole is protected around the edges with Ikea cable tube held on with the remaining nails from the backing. The bottom where the box is sitting on is one of the drawer bottoms.

    Last steps were to add in a motion sensitive light and I added 2 more L brackets with another drawer side to act as a brace so the box won’t shift when in use. The concern was the cat could potentially trap himself in side.

    ~ mcquarris


  • My PERFEKT Wine Cabinet

    Materials: PERFEKT Storage System

    Description: Vino anyone? I love wine, but often had no place to store several bottles (My kitchen is about 90 sq ft). I used a portion of the Perfekt storage system to create a cute little wine cabinet in my kitchen. I removed the drywall and portions of 2 X 4s in the foyer to create a niche for the shelving system. I added supports on either side for a tight fit, then added molding on the outer edges for a finished look. Now I can store up to 10 bottles at a time!

    ~ Kim B, Jacksonville, FL


  • Billy Morebo for the toilet

    Materials: Doors Billy Morebo, Ikea textile, glue gun, scissors

    Description: During renovation of our toilet we decided not to use standard sanitary door and purchased two doors Billy Morebo from Ikea.We decorated them with Ikea textile and added several pictures with the same textile on walls.

    More pictures of result and process see on our site prohandmade.ru. Enjoy!

    ~ Ekaterina, Moscow, Russia


  • Dudero – made into a real dude!

    Materials: DUDERO, black paper, a fake mustache, white chalk, scissors and a knife.

    Description: We bought the DUDERO – but we found it too plain and boring. So after pasting on a fake mustache, which made it look like Freddy Mercury, we decided to make the lamp into a pirate. See the result!

    ~ Rowan Zajkowski, Raamsdonksveer, The Netherlands


  • Inverse Regolit

    Materials: Regolit, Januari

    Description: I was always a big fan of the simplicity of the Regolit lamp, so I’ve designed a very basic and clear lamp. It’s a combination of the pendant lamp Regolit and the table lamp base Januari fixed with cable clips. The result is this smart Bauhaus inspired lamp.

    ~ Daniel, Stuttgart, Germany


  • Kitchen island on wheels

    Materials: STENSTORP kitchen island NOK 3.250,-, 4 wheels ca. NOK 1200,-, drill, hammer

    Description: A couple of years ago I bought a STENSTORP kitchen island. Because we have little space, I wanted to have put wheels on it for more flexibility. We did the makeover this winter and it works so well!

    My sister is a handy woman and did most of the work. I took pictures, and chopped of the legs, actually sawed them!

    The item has shelves on one side (now called backside). On the reverse side there is an open space so you can use it as a bar, with stools (now called front side). The two parts are divided by a wall, which serves as the back of the shelves.

    First we took the top of the kitchen island.

    Then we sawed of the horizontal planks that are holding the front side legs. Then we shortened all legs.

    We took the legs from the front side and fasten it to the vertical plank that is holding the wall.

    Then we took horizontal planks and fasten it under the legs, and fasten the wheels in them.

    In the end we put the top back on!!!

    Voila! And good luck!

    ~ hildeovedia, Oslo, Norway


  • Hiding computer nook cables and equipment

    Materials: Kassett

    Description: I cut the handle opening to a larger size to accommodate the cords and cables and allow for more ventilation.

    Place everything in the box, close lid.

    Here is a picture of the before mess and the after.

    After

    See more of Mel’s quick clutter buster.

    ~ Mel, Mississauga, Ontario


  • How to change an old “ODDA” into fine art piece

    Materials: ODDA bed side table, paint, silver polish…

    Description: After having seen some nice designs on classical furniture, I tried to do the same on an old Ikea bed side table I found next to the bin! After a little sanding and an undercoat, I traced the drawing, then painted details and finished with a silver polish and tinted varnish… Et voila!!!

    ~ Mélanieblue, Nice, France

    See more of Melanie’s painted Odda bedside table.


  • Hacking my template

    Firstly I want to thank you for your feedback and help when I asked for it. In many ways, your comments gave me a clearer view of how to improve Ikeahacker as well as chart a direction for it. Thank you, thank you! I feel re-inspired.

    In response to that (I wouldn’t want you to think that I wasn’t listening!) I have made a few tweaks to the current site. Mind you, this is not the big redesign I was talking about (which I am now seriously considering WordPress. Any thoughts?). I don’t want to do too much on this template since I won’t be using it in the redesign. But I do want to make sure that your experience on this site, while I work on the new design for the next coupla months, is a lot more useful and friendly. So here goes:

    Many of you asked for:
    1. Better navigation
    – I’ve added the “older” and “newer” posts links at the bottom of the page. Hope that takes away the frustration of browsing the archives.
    – Related posts complete with thumbnails are now under each post.  

    2. Better search
    – Under the existing categories section, I’ve added a drop down menu of all available Labels.
    – I’ve also begun adding the Ikea names of the items hacked into the Labels. I do still forget some times. So do bear with me while I get the hang of it.

    3. Less clutter
    – I’ve increased the size of the left content area, as some of you mentioned, to give it space to breathe. This lets me include bigger photos too.
    – Removed the Recent Comments (which many didn’t find useful), moved the Friends Link List to a dedicated page. Tidied up things in general.
    – Used images for the Top Hacks instead of text. I kinda like this alot myself! 🙂

    Little tweaks. But it’s an improvement, don’t you think?


  • Convert 2 Vikare beds into a bunk

    Materials: Vikare children’s bed

    Description: After the twins grew out of their baby beds I swapped the beds for two Vikare beds. It was not a comfortable solution as the room is very small. So I decided to build a bunk of the two beds.

    I took away the shanks and replaced them for four wooden beams. Then simply drilled a few holes in the beams and put larger bolts and nuts in. For steps, I placed a Trofast cabinet/steps next to the bed, which is not in the picture..

    It is a charming little bunk, because it is not 2 meters long as a usual bunk is. And as the kids grow taller, the beds are still convertible into longer beds!

    Unfortunately the Vikare beds are not for sale anymore (in the Netherlands).

    ~ Barbara Kramer, the Netherlands


  • Customizing Expedit storage boxes

    Materials: EXPEDIT shelves + DRONA box

    Description: This is just a small hack but was useful for our newly painted room – sage green.

    In the room we have a single 4 box Expedit shelf in a very small space. I had bought Drona boxes to go with the shelves but they come in limited colours which looked awful with our green room so I just grabbed some fabric (happens to be Ikea fabric) and fixed my small but irksome problem.


    Simply take fabric that works with your room/space/colours and measure a square just slightly bigger than the front of the Drona box. (1/2 inch should do)

    Fold down the edges and iron a crisp fold (ensure you have made it narrow enough to tuck under the handle/flap of the Drona, but wide enough to cover the front of the box.

    I used a glue gun and just glued all around the edges of the fabric and stuck it down.

    I started on the top/flap end and put the glue on the box, under the flap and then slid the fabric under the flap (using a spatula or cake knife to get it under smoothly and press the fabric onto the glue.

    It’s a small thing but the room looks so much better having something that looks coordinated with the room. Everyone surprised to learn its all Ikea.

    ~ Meredith, Luxembourg


  • LED-Pimped Vika Lauri

    Materials: Vika Lauri, Dioder

    Description:
    – Setup your Vika Lauri table
    – affix a string of white or multi-color Dioder LEDs to the inside, metal lip with the provided sticky tape
    – conceal wires along the same inside edge and mount control box also using sticky tape

    ~ Kevin Freitas, Tacoma, WA, USA

    See more of Kevin’s colour changing computer table.


  • Quick Tassa Natt sconce hack

    Materials: Tassa Natt, Screw driver, Pencil, Ruler (optional for tracing or making designs), Scissors, Sheet of 8 1/2″ x 11″ white paper (regular printer paper is perfect), Markers (permanent for teens or adults), (washable for kids), Candelabra style, 25 watt bulb (get a pack for cheap while you’re at Ikea).

    Description: I am submitting my Ikea Tassa Natt hack. Take one Tassa Natt sconce lamp (found in the children’s lighting department) remove the ugly paper dancing frog cover from the lamp. Make your own new drawing using permanent markers and printer paper and you’ve got yourself a new lamp.

    ~ Doris

    See the tutorial on Doris’ blog here.


  • Lack cross-shelf

    Materials: Lack shelves, Dioder multicolor LED light strips, angle brackets, circular saw, drill, screwdriver, paint, caulk

    Description: We wanted a shelf or table unit to fill a narrow vertical space adjacent to the bed. My wife conceived the fusion of two Lack shelves in an uneven cross, mounted off the wall to make the shelf appear to float. We used two Lack shelves, a 43″ and a 78″, made two hemi-lateral cuts in order to fit the pieces together, and mounted the horizontal shelf using the standard IKEA Lack bracket, though keeping it off the wall by 2″.

    The vertical shelf wasn’t going to support any significant weight, so we ditched the standard bracket and used a simple angle bracket at either end to hold it in place. The shelf brackets were primed and painted to match the wall color to give the effect of the floating shelf. The seam where the two shelves meet was finished with painter’s caulk. Finally, two sets of Dioder LED lights were mounted on the back, giving the floating shelf a cool glow. A few lazy nights to plan and two half-days on the weekend to put together, one of our favorite new additions.

    ~ Matt Tremblay, San Diego


  • Tullsta’s new legs

    Materials: Tullsta, old chair base

    Description: The back legs on the Tullsta chair quickly began to weaken and threatened to break if someone sat down too quickly.  We had an old rocking chair from the 70’s; orange, worn and ugly. But I was very lucky because it had an excellent base which was easily mounted to the bottom of the Tullsta with eight lag bolts.  Then, it was just a question of moving the spider further back to achieve perfect balance.

    ~ Colin