Author: Jules

  • Gorm Propagation Station

    Materials: GORM shelving, shop lights, heat mats, hooks, duct tape, power squid

    Description: This is our propagator for starting seedlings in the basement.

    We chose GORM shelves that make a total width of just over 4′, since standard shop lights are 4′ wide. After assembling the shelves, we added some screw in cup hooks to hang the shop lights from. The lights can be raised as the plants grow.

    We put heat mats on one of the shelves since some plants like to be warm. The power for heat mats and lights is fed through a power squid which is taped under the middle shelf to keep it under control. We also put some plastic sheeting on the shelves to reduce the chance of water leaking through.

    ~ Edward and Cheryl, Boston, Massachusetts, USA


  • Table vase

    Materials: VIKA FURUSKOG 2000×600

    Description: Flower vase in the table as if flower comes out from VIKA FURUSKOG.

    1. Used Mayonnaise bottle lid on the under surface of table with screw.
    2. Drill a hole in table and lid.
    3. Fill water on the bottle.
    4. Screw bottle.

    Only 5 minutes.

    ~ Tomokazu Hayakawa, Tokyo,Japan.


  • From Sweden to Morocco

    Materials: Erslev rug in light green

    Description:

    1. I created a stencil by tracing a Moroccan tile shape onto a piece of card stock and cutting out the negative space with an Exacto knife.
    2. I placed the stencil on the rug starting in the top left corner.
    3. I used a washable white fabric paint and a stippling brush to fill in the stencil.
    4. I repeated steps 2 and 3 working my way from left to right all the way down the rug until the design was completed.
    5. Painting freehand, I filled in the unfinished spots left by the “bridges” of the stencil.

    ~ Natalie, San Francisco


  • Two Expedits, one original Mix

    Materials: 2 expedit 2×2 , some piece of wood

    Description: I ask myself how to create an original 2×4 Expedit shelving unit, less expensive that the original one. So i try to join 2 small Expedit. (In France, Expedit 2×2 is 20 , Expedit 2×4 is 55)

    To do what you see in the photos, I have to

    – Fix top parts with medium plank
    – Fix bottom parts with long plank (be sure you will not see middle holes)
    – Fix the central parts with medium plank
    – Create 2 holes in each side to “encase” the central parts
    – Paint the screw in white

    This is really easy to do and you can change the position of the colors.

    And it’s done. See more here.

    ~ Jeremy Guilbault, Nantes, France.


  • From Kitchen to Home Studio

    Materials: Ikea Ordning Dish drainer

    Description: The hack is really simple. I needed something useful to create a litlle home studio, but what I found in specialized shops was too expensive. For this hack, you just need the Ordning Dish drainer but you have to reverse the position of the railings. We have lots of place in the back for cables and electric plugs.

    ~ Jean-François CAUCHE,Lille / France


  • Leksvik goes cool

    Materials: Leksvik bookshelf

    Description: We took some IKEA fabric and nailed it behind a Leksvik bookshelf. No one can see our boring wall anymore and it looks very cool.

    ~ xenu, Germany.


  • Akurum cat cabinets

    Materials: Akurum 21″ base cabinets w/ drawers, Abstrakt doors, Svep handles

    Description: My wife and I have been wanting to hack Ikea for a long time, in an effort to wrangle our cats’ litter and food (not only to keep the house cleaner, but also to keep our dog from grabbing late-night litter snacks). Knowing that cats can get picky when it comes to where they do their business, I wanted to make sure that they wouldn’t have any less room to use the box than they had previously with their covered litter pans.

    After constructing two Akurum base cabinets (making sure they were wide enough to accommodate our largest litter pan), I used the jigsaw to cut a 7″ x 9″ hole out of each one. Originally I was going to make the holes on the outer-facing sides of the cabinets. However, I was fortunate to stumble upon an “as-is” countertop at Ikea for $30. Aligning the cabinets to the edges of the countertop allowed me to make the portholes on the interior sides; this way I don’t have to worry about what other furniture surrounds them and the portholes are always accessible.

    As a bonus, I picked up a spice rack (Rationell Variela) that fits perfectly inside the cabinet; it’s the new cat food trough!

    ~ Steve


  • Workstation Stolmen Hack

    Materials: Stolmen, Expedit

    Description: Poles and brackets are Stolmen, Storage unit is Expedit. Desktops and Shelves are from my workshop. Very adaptable and solid.

    ~ Charlie Priced


  • Ikea Kitchen Squad ready to shock and awe

    If you know people with a dingy kitchen you may want to let loose the Ikea kitchen squad on them. Ikea Kitchen Squad is a TV show in the UK featuring an undercover group of designers, planners, service experts and installers who fly in to save the day for teary and weary homeowners.

    Previously they have already helped three kitchens in crisis, by creating cool Ikea kitchens tailored to their needs and family requirements. Now they want to do the same for Colleen whose dingy kitchen with doors hanging off and an overheating oven is just too small for the family to sit around in together and enjoy an evening meal. 

    Colleen’s kitchen Ikea-Kitchen-Squadified

    The one they killed

    I’m not sure when it’ll air and I won’t be able to catch it (it being on UK TV and all). But if you do, let me know how it when. Check out the trailer.

    Click for more info on Ikea Kitchen Squad.


  • Pop-up Paper Ikea House

    Materials: Images of IKEA products

    Description: A while ago I designed a pop-up paper house using exclusively Ikea products: all the furniture, obviously, but also all the accessories, sheets, framed artwork, towels, lights, even the floor treatment came from their store. My idea, of course, was to become rich and famous. I would show Ikea my work, they would hail me as a brilliant designer and give me lots of money to design a new house each year, to match their yearly catalogue. It seemed like the perfect idea for them: if mass produced this could be a very inexpensive toy, it is completely wholesome even though it blatantly promotes their products, it folds flat for storage not just in the store but also for the end user (and we all know how obsessed Ikea is with flat storage), plus they could come out with a new house every year and tap into kids’ natural tendency to hoard and collect!

    Sadly, my dreams did not come true. I just got an unsigned form letter informing me they weren’t interested in whatever it was I had sent them. When I wrote back asking if I could use their images to sell the house on my own they didn’t even bother reply, so I went back to the drawing board and stripped my house of everything which is recognizably Ikea.

    So here is the Ikea hack which isn’t. If you’d like to build the house you can (by following the links you can get templates with precise instructions), but the book or PDF download no longer contains Ikea stuff. But you know what? It’s much nicer now! (these photos are of the old Ikea version)

    ~ Katherine Belsey

    See more of Katherine’s pop-up paper Ikea house


  • Time to tweet

    Valery is an illustrator who does a really sweet work on the Piro wall clock.

    “Basically, I purchased the PIRO wall clock from Ikea since I really liked its design. Also, since the frame is made out of wood, I thought it would be easy to tint or paint to personalize the product even more.

    Once unmounted, I spray glued my illustration right on the top of the numbers, let it dry and there you go! A nice illustrative wall clock to display my illustration work.

    I actually tried this with many Ikea wall clocks before but it was really hard to disassemble them without breaking anything. I hope you will enjoy this hack.”

    If you love it, her clocks are available for purchase here. Or simply visit her website.

    ***

    Do you tweet?
    Talking about tweeting, I’ve never been really big on Twitter, though I created a personal account some years ago.

    But if you like to be updated on Ikeahacker via Twitter, you can connect with me @ikeahacks. You’ll get the latest blog posts whenever there is an update and maybe, just maybe, some tweets about what I am having for lunch. Hmm. Maybe not.


  • Kura Bed Tent Planetarium

    Materials: KURA Bed Tent, Solar System Set

    Description: Using the KURA Bed Tent I attached planets from a solar system set my son had. I used a needle and thread to stitch the planets directly onto the tent. The planets glow in the dark so at night in the darkness of the tent, they look great.

    ~ Shannon, Florida

    See more of Shannon’s KURA bed tent Planetarium


  • Stora bed bracing

    Creaky beds are no fun. So Ben cranks up the cables on the Stora and stops the squeaks.

    Ben says, “My son has a Stora loft bed.  We like it, especially as he has high ceilings in his room.  However, even after tightening up the bolts several times, the frame still creaked and moved too much for my liking.  I thought about lag bolting part of the frame to the wall, but that seemed to be painful.

    Here’s the original bed:

    Here it is, all cabled up:

    I decided to put in some cross bracing, but didn’t want to put in some wood diagonals.  My father suggested some cable cross bracing, so I gave it a try.  I went a bit overboard and got stainless steel cable for the looks. Originally I was going to put in lag eyes to thread the cable through, but I decided for the back to go with through bolts – I found 3/8″ stainless steel ones at home depot with bolts to match, as well as the turnbuckles to tighten the cable.

    I went on webriggingsupply.com to buy the cable because I didn’t like the options at Home Depot or Lowes. I bought Type 304 very flexible Stainless Steel Aircraft Cable from there (if it’s called aircraft cable why does it say it’s not for aircraft?).  I also bought “eye nuts,” from there, which thread on the other end of the through bolts and let me thread the cable on the inside, and copper duplex sleeves and stops to use on the cable.

    The “swager,” is an expensive piece of equipment most places, which allows you to squeeze the sleeves to make them tighten around the cable to form loops.

    I was lucky to find one for about 30 bucks at Lowes, about half the price of the other places.  For the front posts (the ladder side) I bought stainless steel eyes, again from Home Depot.  I then threaded the cable around. Instead of having four pieces of cable and two turnbuckles for each “X,” I decided to try running the cable up one post, diagonally to the other post, up the other post, and then diagonally down, with a turnbuckle in between.

    Close up of the turnbuckle with copper duplex sleeves

    There is minimal slippage of cable in the eyes, and this works great – the bed frame is much stiffer and hardly creaks when he goes to bed anymore.

    FYI, that’s a Gustav desk under the loft bed that my brother-in-law didn’t want.”


  • River view and storage cabin bed

    Materials: Malm/ Mandal? plus Expedit, Traby and Snack. Plus large screws.

    Description: The aim of my latest hack was to give myself lots of storage and a better view of the river from my bed. An expanding family meant storage in my small flat was ever decreasing and I had bought a very low, superking size bed in a sale, which was about as useful as a chocolate teapot. The simple plan then was to raise the bed up to kill two birds with one stone…

    So keeping the original mattress, I bought what I believe is either a Malm or Mandal bedframe- I think this is now discontinued which would explain the cut price cost that I bought it for. Also part of the puzzle was an Expedit bookcase and two Traby shelf units.

    The bed frame was put together in the usual way, except the small feet were left off. Instead, the Expedit bookcase was bolted to the bottom of the bed, and the Two Traby units to the top two corners, facing outwards to provide storage. For extra support I made a leg to support the central bedrail on the floor. 3 Snack boxes on castors look and work well, and leaves a massive storage space under your bed for all sorts of junk…

    ~ Pods, Newcastle


  • Doodle on my time

    Oops, broke Father Time’s face? Just replace the Rusch clock face with an art piece. In Claudia’s case, a piece of doodle by her kid, Topastro. Her kid’s not quite Picasso yet but give him some time (no pun intended) and you’ll never know. Anyways, you get the idea and the possibilites here are endless.

    Broken

    Time is well again

    See how to personalise your Rusch clock here. (Italian) Google translation here.

    Admittedly, the Rusch clock is not one of Ikea’s prettier products (I think it’s been yanked from the production line). But there are so many ways to give Time a new face. Check out these Rusch hacks:
    Laura’s loteria clock
    A photoframe clock
    Time bomb clock
    Rusch clock’s new face
    International analog clock


  • Ikea Hacked OFFI Woody Table

    Materials: Frosta Stool, Stainless Steel Bowl, Wooden Table Top, Chalkboard Paint

    Description: I knew if I could make a similar looking table to the Offi Woody Chalkboard Table, IKEA would be the place to have the bentwood legs I needed. Just my luck when I came across the FROSTA stool. First, I was lucky enough to find the perfect piece for the tabletop already milled and ready to go in a side table that was set on the curb destined for the trash. Its 29″round which happened to be the perfect size to create the Offi Woody Chalkboard table that was my inspiration.

    I used the stainlees steel bowl I bought at Home Goods to make the template for the middle cutout. This bowl is 7 1/2″ wide. After tracing a circle around the bowl placed on top of the wood, I made another circle 7 1/4″ wide so the the lip of the bowl would sit over the opening.

    Next, I marked the center axis of the table top, and lightly drew an X on the underside of the table. These were my points to attach the FROSTA stool legs. Thanks to Ikea, with predrilled holes in the legs and supplied with the correct screws, I simply screwed the legs into place!

    Last came painting the table top itself. I sanded and primed the top, and then added a few coats of Benjamin Moore chalkboard paint, and voila.

    ~ Meghan Shadrick, Boston, MA

    See more on Meghan’s Chalkboard table.


  • I need your help to make Ikeahacker better

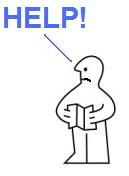
    After almost 4 years of managing this blog, I am going to say I need help. The volume of hacks has grown and honestly, I’ve not been able to keep up with it. Don’t get me wrong, I still enjoy receiving all your wonderful hacks and be amazed at your creativity. That has not changed.

    What gets to me is that instead of spending time improving and enhancing the content of this blog, I’ve spent many hours cutting and pasting, downloading pictures, resizing photos, setting up links and the like. I know it comes with the territory and I do take it all in my stride. But, I am sure there are ways to work smarter and be more productive.

    So I came up with a Hack Submission Form. The goal is to make it easier for you to share your hacks as well as simplify the process for me to get it up on the blog. This is where I need your help. The Form is in … ahem, cough … beta. I need your help to iron out the kinks, report any issues and give me feedback on whether it drives you up the wall. If you have a hack that you wanted to share but haven’t, this is your moment. Read this post on how you can post your hack.

    Now, on to the help I really, really want
    The Form is in essence a contact form, nothing fancy. What I REALLY, REALLY want is a WYISWYG editor. Something like this (pix, right), where you can compose your message and get it to me in 99% “ready-to-post” form. Alas, I couldn’t get WriteToMyBlog to work and I my email to its support failed to get a reply.

    WriteToMyBlog uses TinyMCE, an open source word processor written using the JavaScript programming language. If you know how to achieve something similar (and integrate it with Blogger), please, please contact me at ikeahacker [at] gmail [dot] com. I would love to explore possibilities with you.

    Besides this, I am also working on a new template. This one has been around for a year or two now and it looks tired. Hope to unveil it before we hit the start of our 4th year. (Phew! Has it been that long?)

    I’ve also received ideas from some of you. (Thank you!) Second the idea if you think it’s good and I’ll see what I can do.
    1. Some one suggested having a “Wish list” for people who like a hack but can’t/don’t know how to build it themselves. Others can choose to fulfil the wishlist for free or for a fee.
    2. Another suggested that I have a “Visitor’s Lounge”, where first-timers to this blog can familiarise themselves with the weird and wonderful world of Ikea hacking.
    3. I’m also thinking of having the “Most popular hacks”, a list of the most commented/viewed hacks.
    4. As well as a “Table of contents”, to make searching for hacks easier.

    If there are other improvements you want to see on this blog, let me know in the comments below. I look forward to hacking this site with you.

    Read this to know how to post a hack. Then share your hack via this form.


  • Macbook vertical laptop stand

    Another one from Shelemka. Good for stowing away your Macbook when not in use.

    “I made this vertical laptop stand for my 13” Macbook Pro using 7″ x 10″ Anordna glass shelves that I bought when Ikea was clearing them out (I believe they’ve since been renamed to Lillangen), some 1 1/2 inch screws with blunt ends (machine screws?) and 10 -1/4″ x 1/4″ rubber washers that fit tightly (serving as nuts to hold the glass in place). Although the glass does sit flat on the desk, I did add a stand I had from an old external hard drive for extra stability.”

    Related hacks:
    Laptop stand for working in bed
    $2.99 laptop stand
    Quick and easy laptop stand
    iMac computer desk

    Too lazy to make one? Try this barely there stand or a floating stand.


  • Stainless steel desk tray for your work station

    Shelemka made this catch all stationery tray from the Ikea Boholmen rinsing basket (discontinued, I believe), 4 Kosing knobs, and 4 -1/4″ x 1/4″ rubber washers.


  • From rugs to runners

    I like the clean simplicity of Clara’s hack – a long runner from Ikea rugs (which reminds me that I need one for my entryway) and little patchwork accents completes the look.

    The rugs in question is the Signe, which goes for only $2.99 each. Three of these would set you back less than a meal in town, and they lasts longer. Ok, now to the hack. The ends, right before the knots, were first soaked in Fabric Mod Podge. When dried, Clara ran them twice through the overcast machine. “The first,” she says, “to serge the edge and to cut just enough to get all three rugs to fit in the space. The second time, without the cutter, was to catch any stray threads.”

    See Clara’s instructions for her rugs to runner.